
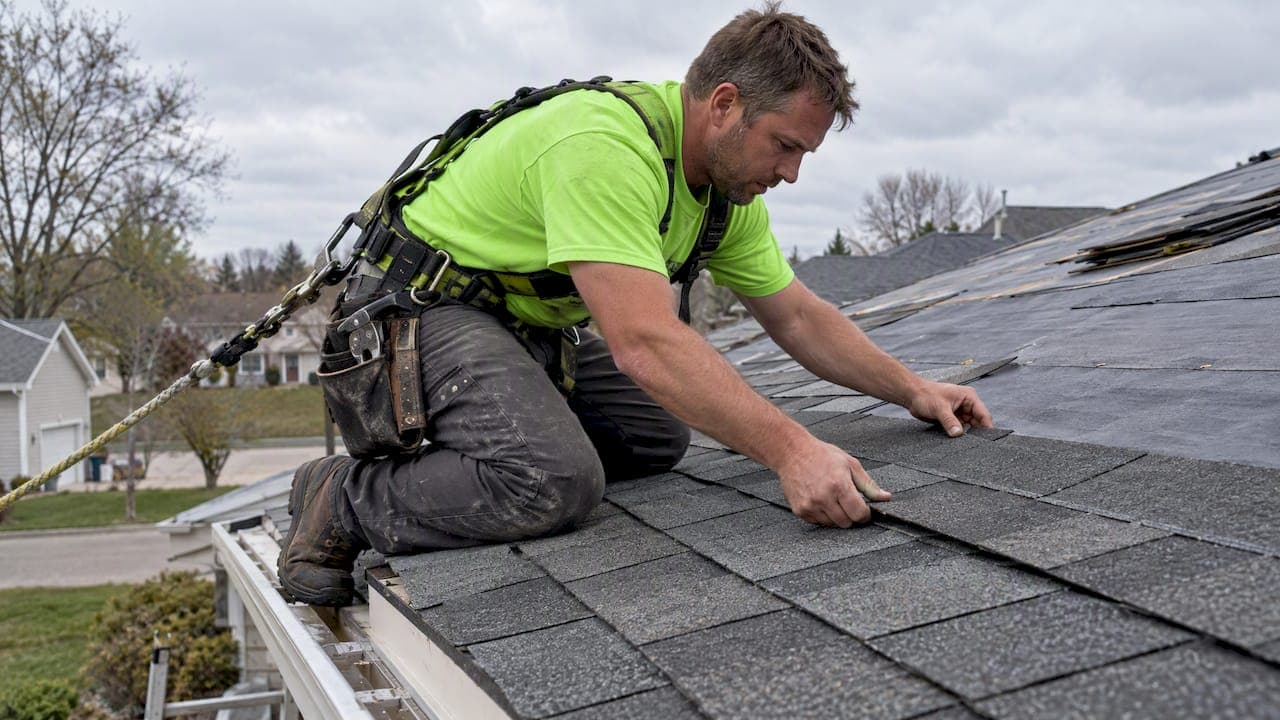
Most roof failures start with how the roof was installed, not with the shingles or panels. The usual causes are shallow shingle offsets, bad nailing, missing flashing, poor ventilation and skipped deck repairs. This guide lists each mistake, explains why it causes leaks, and shows you how to check for it before and after your roofer works on your home.
TL;DR
- Most roof problems come from workmanship: nails, flashing, drip edge, starter strips and deck prep.
- Ask for these details in writing before you sign, and check photos of them during the job.
- Poor attic ventilation and moisture shorten a roof's life even when the install looks fine.
- Metal roofs add their own risks: panel movement, fastener seating, laps and slope.
- Signs of bad work show up in the attic first: wet insulation, stains, mold, warped wood.
Table of Contents
- Why installation matters more than the material
- Mistakes in the roof deck and preparation
- Shingle layout and nailing mistakes
- Flashing and edge mistakes
- Ventilation and attic mistakes
- Extra mistakes on metal roofs
- Mistakes in hiring and planning
- How to check a roof installation
- Signs of a poor roof installation
- Our perspective
- Roofing from AM Exteriors
- FAQ
- Sources
Why installation matters more than the material
A premium shingle on a badly built roof still leaks. A mid-range shingle on a well-built roof can last for decades. The materials matter, but the crew decides the result.
Exterior consultant Mark Parlee notes that many roofing failures come from basic omissions, such as leaving out step flashing or drip edge. A professional contractor includes both as a matter of course.
That is why this list focuses on details you can ask about and verify. You do not need to climb a ladder. You need to know what to request.
Mistakes in the roof deck and preparation
Covering damaged decking
The deck is the wood layer under your roof. If it is rotted, wet or uneven, the new roof sits on a weak base. Guidance for standing-seam metal roofs says to remove debris and protruding nails or screws, repair or replace damaged or rotted decking, and leave a smooth, uniform surface. The same logic applies under shingles.
What to do:
- Ask how the crew finds bad decking. Walking the roof after tear-off is the usual way.
- Ask how replaced decking is priced and documented.
- Ask for photos of any boards replaced.
See our guide to roof decking replacement for what this work involves and why it can change a quote.
Wrong measurements and wrong materials
Incorrect measurements can cause delays and added costs. Incorrect materials can cause corrosion or leaks. Ask who measures the roof, whether the quote lists every accessory (underlayment, flashing, vents, drip edge), and whether the materials suit your roof's pitch and your climate.

Skipping the leak-prone zones
Wisconsin roofs face ice, snow load and wind. Eaves and valleys take the worst of it. Our article on the 25°F rule and ice and water shield explains where extra protection belongs and when to hire a pro.
Shingle layout and nailing mistakes
Too little offset between courses
Each row of shingles should be shifted from the row below so seams do not line up. A common layout error is less than a 4-inch offset between courses. Manufacturers typically require at least 4 inches so water is deflected instead of finding a straight path to the deck.
Nails in the wrong place or number
Common asphalt shingle nailing errors include too few fasteners, nails placed too high or too low, and no storm-nailing with six nails per shingle in high-wind areas. The same source notes the problem. Other deficiencies include haphazard, missing, overdriven or crooked nails.
Why it matters:
- Overdriven nails cut through the shingle and hold poorly.
- Nails set too high may miss the reinforced nailing zone.
- Too few nails leave shingles open to wind lift.
If you live in an area with strong storm winds, ask your roofer for the nail count per shingle and the manufacturer's wind-rated installation method.
Misaligned sealant strips
Asphalt shingles rely on a temperature-activated adhesive. According to the Insurance Institute for Business & Home Safety, misaligned sealant strips can prevent the top shingle from bonding to the layer below. A shingle that never seals can lift or blow off. Cold-season installs need extra care here, because the strip needs warmth to activate. Ask how the crew handles late-fall or early-spring jobs.
Weak starter strips
Starter strips at eaves and rake edges help block water and resist wind uplift. IBHS calls failing to install them correctly a significant oversight. Cutting a regular shingle down as a starter is a shortcut some crews take. Ask what starter product will be used.
Flashing and edge mistakes
Flashing is the metal or membrane that sends water away from joints. Most leaks start here.
Missing drip edge
Without metal drip edge at the roof edges, including gable ends, water can cling to the underside of the deck through capillary force. That causes decay and leaks. It is cheap to install and costly to omit.
Missing step flashing and kickout flashing
Where a roof meets a sidewall, step flashing should be woven in with each shingle course. A kickout at the bottom of that run sends water into the gutter instead of behind the siding. Leaving either out can rot the wall under your siding for years before you see it. The Flamco guide above covers these omissions in detail.

Plumbing vents sealed with asphalt cement
Plumbing penetrations are often "black-jacked" with asphalt cement instead of fitted with proper boots. This is a leading cause of leaks around roof penetrations. Cement dries, cracks and fails. A boot with a proper flange lasts much longer.
Poor chimney and penetration flashing
The U.S. Department of Energy lists improperly installed flashing around chimneys and other penetrations as a source of attic moisture problems. Ask for flashing details at every chimney, skylight and vent before work starts.
Ventilation and attic mistakes
A roof does not end at the shingles. The attic below it affects how long the roof lasts.
The DOE identifies moisture as the number one threat to attic durability. It says avoiding moisture intrusion and ensuring proper ventilation are key. Among the causes it lists: moisture entering without proper ventilation, and exhaust fans vented into the attic instead of outside.
Before a new roof goes on, ask:
- Are intake and exhaust vents being added or kept?
- Are bath and kitchen fans ducted outdoors?
- Will new vents be blocked by insulation?
If your attic already shows moisture, read our guide to attic mold causes first. Fix the source or the new roof will inherit the problem.
Extra mistakes on metal roofs
Metal roofs reward careful installation and punish shortcuts. The top-ranking guides agree on the same trouble spots.
| Mistake | What goes wrong | What to ask |
|---|---|---|
| Ignoring thermal movement | Panels expand and contract with temperature. Buckling or seam stress can follow. | Which clips are used for long panels? |
| Wrong slope for the panel | Water backs up at laps or seams. | What is the minimum pitch for this panel? |
| Fasteners over- or under-tightened | Leaks, or damaged panels | Do installers follow the manufacturer's pattern? |
| Weak laps and sealant | Water enters at overlaps | Which sealant, and where? |
| Rough handling of panels | Dents, scratched coating | How are panels stored and lifted? |
Some specifics from the sources:
- Standing-seam roofs generally need a 1/4:12 minimum pitch. Fastener and clip patterns should follow the panel maker's specifications. Expansion clips let longer panels move with temperature changes.
- For exposed-fastener or lapped panels, IBHS gives a 3:12 minimum slope when sealant is applied to the overlapping edges, and 0.5:12 when lap sealant is applied. Fastener patterns depend on the deck, roof cover, roof height, pitch and location.
If you are weighing metal for your home, see our page on standing seam metal roofing in Wisconsin.
Mistakes in hiring and planning
Some errors happen before anyone touches the roof.
- Choosing on price alone. A low bid often leaves out drip edge, starter strips, deck repair or ventilation. Compare line items, not totals.
- Accepting a vague contract. The contract should name the shingle or panel, underlayment, flashing, vents and what happens if rotted decking is found.
- Replacing when a repair would do, or the reverse. An honest contractor tells you which. Our guide on repair or replace for a Wisconsin roof helps you decide.
- Ignoring flat sections. Low-slope areas fail from drainage problems more than from material choice. See flat roof options.
- Forgetting the roofline. Soffit, fascia and gutters work with the roof. Worn parts let water in. Check our soffit, fascia and gutter repair page.
- Skipping care afterward. Algae and debris shorten shingle life and can affect warranties. Read about roof algae prevention.
How to check a roof installation
You can reduce risk without being an expert. Use this list.
Before work starts
- Get a written scope with materials, accessories and deck repair terms.
- Ask for the manufacturer's warranty terms and what installation conditions they require.
- Ask who supervises the crew on site.
- Ask how the crew documents the work.
During the job
- Ask for photos of the bare deck after tear-off.
- Ask for photos of flashing, drip edge and starter strips before they are covered.
- Confirm that vent pipes get boots, not cement.
- Confirm that nails are straight, flush and in the right zone.
After the job
- Walk the ground and look at the roof lines. Rows should be straight and even.
- Look for exposed nail heads, lifted tabs and loose metal.
- Check the attic after the first heavy rain or snowmelt.
- Keep the photos and the contract with your warranty papers.
Signs of a poor roof installation
Bad work often shows in the attic before it shows on the ceiling. The DOE lists signs of water intrusion: warped or rotted wood in the attic, wet insulation, mold or mildew, bubbled paint on the fascia, and worn or warped shingles at roof edges.
On the roof itself, look for:
- Shingle seams that line up from row to row.
- Crooked, missing, overdriven or haphazard nails.
- No step flashing at walls, or no drip edge at edges.
- Plumbing vents smeared with black cement.
- Shingles that lift or slide in wind.
If a brand-new roof leaks, act quickly. Follow the five same-day steps for a new roof leak. If water is coming in now, use our emergency roof repair service.
Our perspective
We have been owner-operated for over 25 years. Our view is simple: most failures come from poor workmanship, not from the product. That is why we supervise installs ourselves.
We put the details you cannot see in writing and in photos. Flashing, decking and fasteners get documented before they are covered. You should be able to ask for that from any roofer.
We also give honest repair or replace advice. A repair that fixes the problem is better than a roof you do not need. When replacement is right, we say so and show why. For insurance claims after hail or wind, we walk you through the process and the paperwork.
We install premium products such as Malarkey shingles and LP SmartSide, backed by manufacturer warranties. A warranty is only as good as the install behind it. Ask every contractor how they protect it.
— Heather
Roofing from AM Exteriors
We install and replace roofs across Southeast Wisconsin: architectural shingles, standing seam metal, synthetic slate, cedar shake and TPO flat roofing. We also handle roof repair and storm damage. Our published range for roof replacement is $7,500 to $18,000, depending on size, pitch, materials and deck condition.
See our roofing services. If you suspect hail damage, book a free hail damage roof inspection.
FAQ
What are the most common roofing mistakes?
The most common ones are shingle courses with less than a 4-inch offset, bad nailing, missing step flashing or drip edge, and plumbing vents sealed with asphalt cement. Poor deck prep and weak attic ventilation also shorten roof life. Most are workmanship errors that you can check for in photos.
What is the 25 rule in roofing?
It refers to slope. For exposed-fastener or lapped metal panels, IBHS gives a 25% (3:12) minimum slope when sealant is applied to the overlapping edges. A lower minimum, 4% (0.5:12), applies when lap sealant is used. It is not the same as the 25°F rule for ice and water shield.
What are the signs of a poor roof installation?
Look for uneven shingle rows, crooked or exposed nails, missing flashing or drip edge, and black cement around vent pipes. Inside, check the attic for wet insulation, mold, stains or warped wood. Any of these within the first year deserves a call to your contractor.
Can I fix installation mistakes without a full replacement?
Often yes. Missing flashing, bad vent boots and loose shingles can usually be repaired. Widespread nailing or deck problems may need more. A contractor should inspect the roof and tell you plainly which case you have.
Sources
- Avoiding Roofing Errors (Flamco)
- Best Practices for Successful Standing Seam Metal Roof Installation
- Roof 101, Insurance Institute for Business & Home Safety
- 10 Roof Goofs and How to Fix Them, Fine Homebuilding
- Guide to Durable Attics, U.S. Department of Energy
- Consumer Guide to Durable Attics, U.S. Department of Energy