
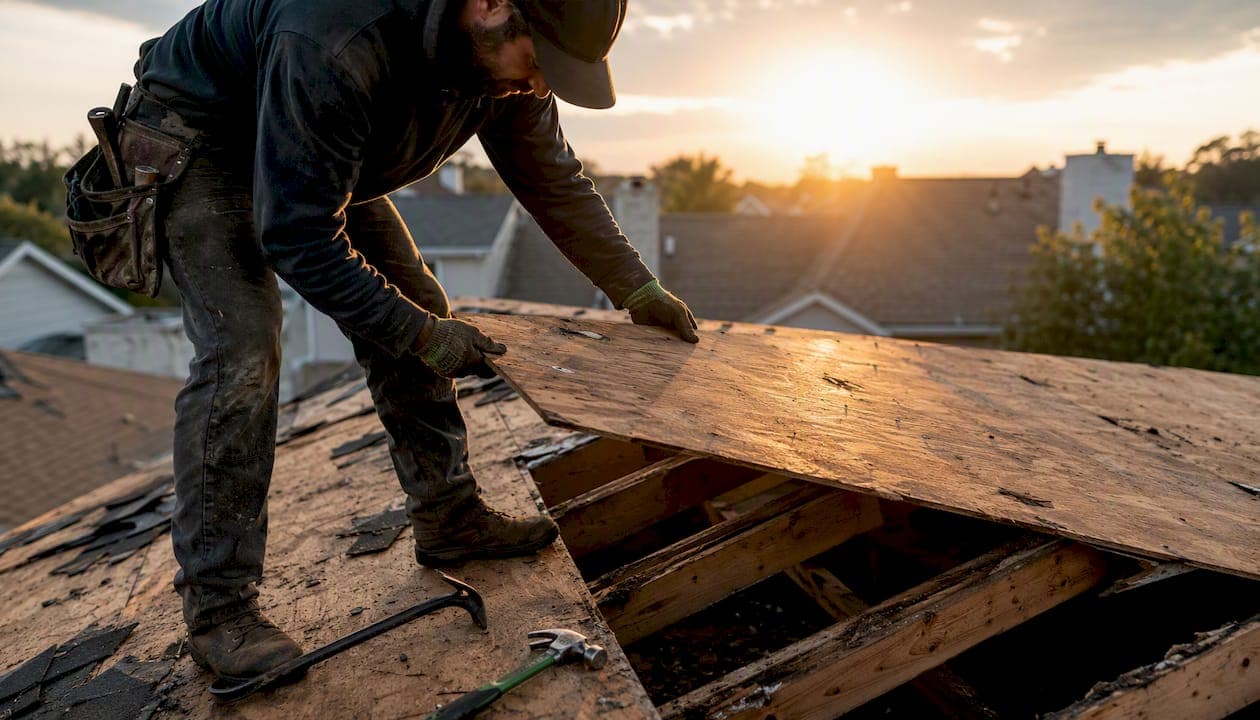
Replace your roof decking when it shows soft spots, widespread rot, sagging, or visible holes. Any structural compromise means new sheathing must go down before new shingles. Professional replacement typically runs in the range reported by Angi, with the final number driven by how much decking is damaged, your roof's complexity, and local labor rates. Start by checking your attic for water stains and soft areas, or call a roofer for a fast visual assessment before your next re-roof.
Key Takeaways
Replace roof decking as soon as structural compromise is confirmed: soft spots, rot, sagging, or holes mean new sheathing must go down before any new roofing materials are installed.
| Point | Details |
|---|---|
| Replace on structural compromise | Soft, mushy, or rotted decking must be replaced before new shingles are installed. |
| Inspect the attic first | Water stains, soft spots, and wet insulation are the earliest signs of deck failure. |
| Cost varies by scope | Small patches cost under a thousand dollars; full re-sheaths on average homes can be several thousand dollars or more. |
| Code and fastening matter | The IRC prescribes panel thickness and fastening schedules; ask your contractor to confirm compliance. |
| Am-exteriors for Southeast Wisconsin | Am-exteriors provides documented inspections, code-compliant replacement, and insurance claim support across Southeast Wisconsin. |
Table of Contents
- What roof decking (sheathing) is and why it matters
- How to inspect your roof for damaged or rotten decking
- How contractors decide between a patch and full replacement
- Step-by-step: how roofers replace damaged roof decking
- Materials, thicknesses, fastening, and U.S. code basics
- What roof decking replacement costs: ranges and main price drivers
- How long a decking replacement job takes
- DIY vs. hiring a pro: what to ask and what to watch for
- How to prevent future decking damage
- Am-exteriors handles roof decking replacement in Southeast Wisconsin
- Am-exteriors' perspective on what actually causes decking failure
- Sources
What roof decking (sheathing) is and why it matters
Roof decking, also called roof sheathing, is the wood or panel substrate that sits directly on top of your rafters. Shingles, underlayment, and flashing all fasten to it. Without a solid deck, nothing above it holds correctly.
U.S. homes use a few common types:
- Plank decking (board sheathing): Older homes often have 1x6 or 1x8 solid wood boards run perpendicular to rafters. They're durable but can gap over time, and individual boards rot in sections.
- Plywood: Structural plywood panels (typically 4x8 sheets) have been the standard for decades. Common thicknesses run from 3/8 inch to 3/4 inch depending on rafter spacing.
- Oriented strand board (OSB): The most common material on homes built after the 1990s. OSB costs less than plywood and performs comparably when kept dry, but it swells faster when exposed to moisture.
- Specialty structural panels: Products like USG STRUCTO-CRETE® are used in commercial or noncombustible applications. Residential homes rarely need them, but they come up in rooftop deck conversions or fire-rated assemblies.
Sheet size is almost always 4x8 feet. Thickness and span rating matter: a panel rated for 24-inch rafter spacing isn't appropriate on 16-inch spacing without checking the span table. Your contractor should match the replacement panel to your existing framing, not just grab whatever's on the truck.
How to inspect your roof for damaged or rotten decking
Most decking damage shows up in the attic first. You don't need to climb on the roof to find early signs.
In the attic:
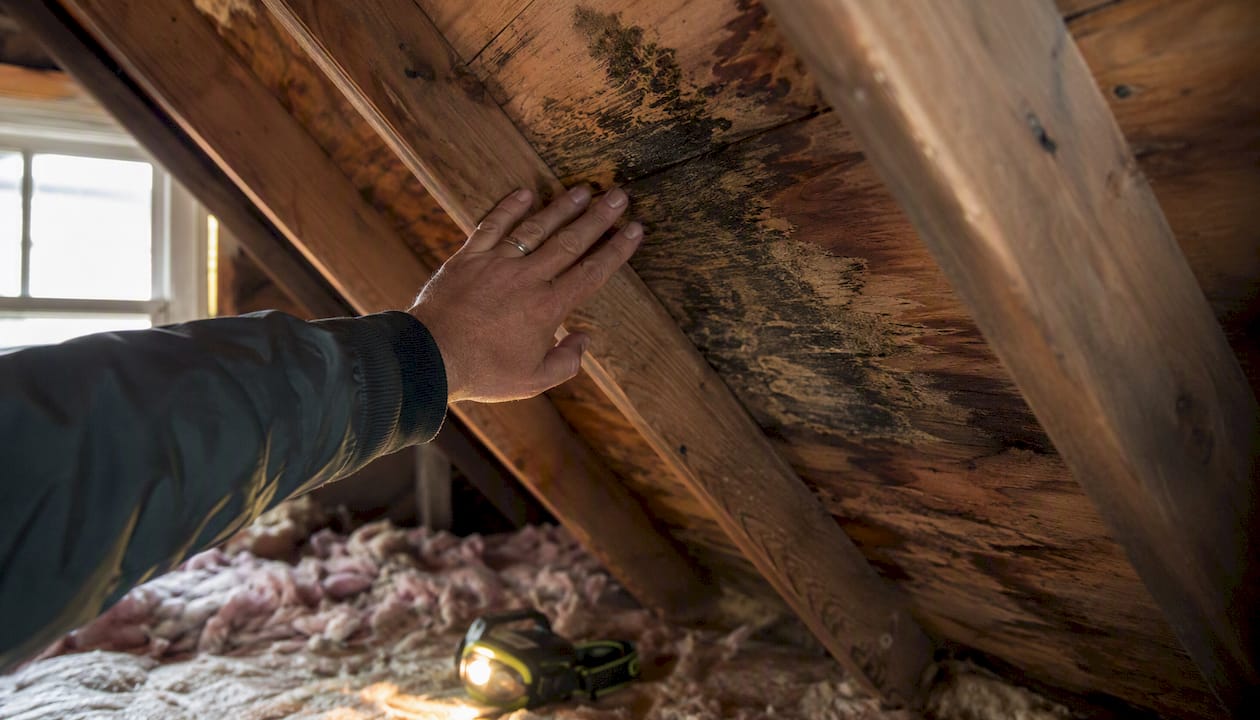
Walk the attic floor carefully and press upward on the sheathing above you. Soft, spongy, or crumbling areas are a clear sign of rot. Look for water stains on the underside of the deck, dark discoloration, or visible mold. If you can see daylight through seams or nail holes, moisture has likely been getting in for a while. Check insulation near the eaves: wet or compressed batts usually point to a leak at the edge of the deck.
From a ladder at the eave line:
Look for buckled or wavy shingles, which often indicate the deck underneath has swelled or shifted. A localized sag in the roofline is a stronger warning sign. If a roofer lifts a shingle during an inspection and the substrate feels mushy or pulls apart, that section needs replacement.
Around penetrations:
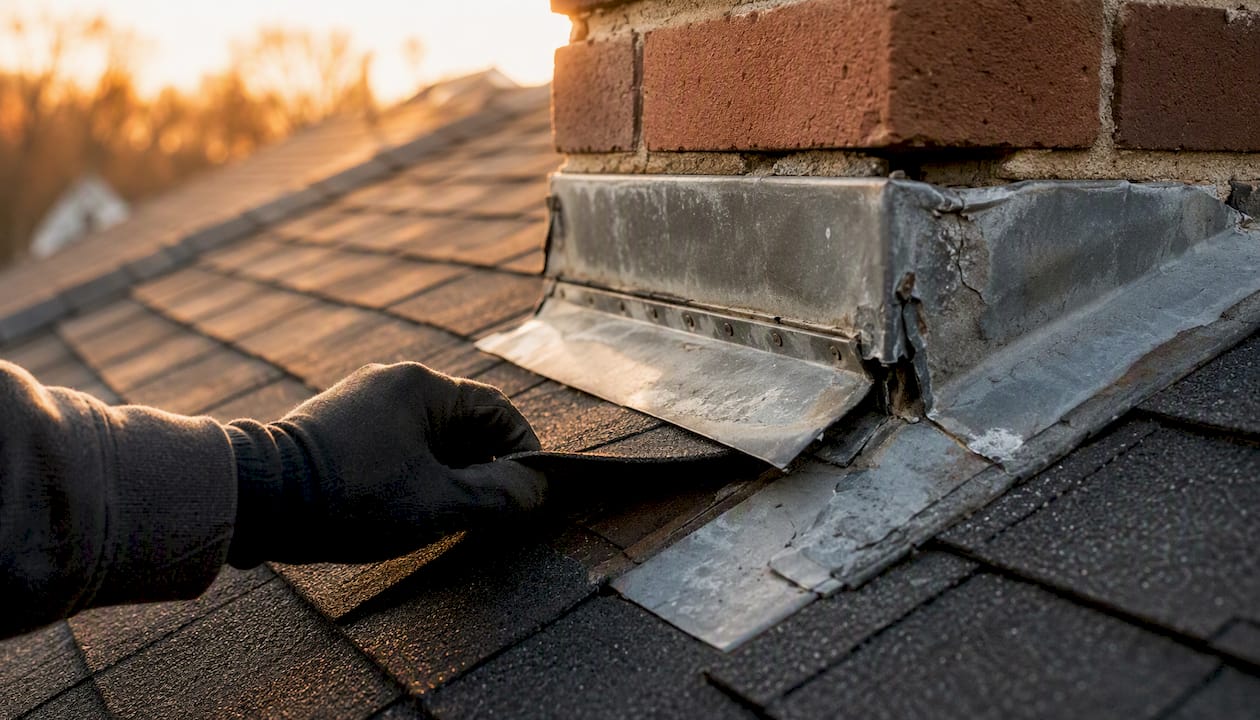
Skylights, chimneys, and pipe boots are high-risk spots. Flashing that has lifted or cracked lets water run directly onto the deck. Check the decking immediately surrounding these areas first.
Pro Tip: If you're not comfortable on a roof, stay off it. A stable ladder at the eave line and a flashlight in the attic give you most of the information you need. Take photos of anything that looks discolored, soft, or wet, and bring them to your contractor. IKO's guidance on rot identification walks through exactly what roofers look for during an assessment.
How contractors decide between a patch and full replacement
Not every soft spot means a full re-sheath. The decision comes down to scope, source, and structure.
Scope of damage. A single sheet with isolated rot near a failed pipe boot is a patch job. Damage that runs across multiple sheets, crosses rafters, or shows up in several locations on the same roof usually points to a systemic moisture problem. Patching scattered rot without fixing the source just delays the next failure.
Whether the source is fixed. A contractor who replaces decking without addressing the flashing failure, ventilation problem, or missing ice-and-water shield that caused the rot is leaving you with the same problem under new wood. Source first, then replacement.
Structural integrity. If rafters or joists are also soft or cracked, the job moves beyond sheathing replacement. A structural engineer may need to assess the framing before any new panels go down. Large spans of compromised sheathing, or any situation where a rooftop deck conversion is planned, also warrant an engineer's review.
Replacing the rest while the roof is open costs far less than coming back in five years.
For a deeper look at the repair-versus-replace decision, Am-exteriors's guide to Wisconsin roof repair vs. replacement covers local examples and common thresholds.
Step-by-step: how roofers replace damaged roof decking
Understanding the workflow helps you read an estimate and spot shortcuts.
Ordered workflow:
- Tear off roofing materials over the affected area: shingles, underlayment, and any flashing covering the damaged section.
- Expose and evaluate the deck. Once shingles are off, the contractor walks the deck, probes soft areas, and marks the full extent of damage. This step often expands the scope from what was visible before tear-off.
- Remove damaged sheathing. Cuts are made back to the nearest rafter on each side of the damaged area so the replacement panel has solid framing to fasten to. Panels that end mid-span will fail.
- Measure and cut replacement sheathing. New panels are cut to fit the opening. Short-edge joints need blocking (a piece of lumber nailed between rafters) to support the panel edge, per manufacturer installation guidance.
- Install and fasten new sheathing. Panels are nailed or screwed to rafters following the fastening pattern required by code and manufacturer specs. The IRC prescribes fastening schedules and span requirements that contractors reference when specifying replacement panels.
- Install underlayment and ice-and-water shield. New sheathing gets covered with the appropriate underlayment before any shingles go back. In cold climates like Wisconsin, ice-and-water shield at eaves and valleys is standard.
- Re-roof the repaired area. Shingles and flashing are reinstalled, matching the existing roof where possible or replacing the full slope if the project warrants it.
Tools and materials contractors use:
- Circular saw or reciprocating saw for cutting out damaged panels
- Nail gun (framing nailer for blocking, roofing nailer for sheathing and shingles)
- Replacement OSB or plywood panels (matched to existing thickness and span rating)
- Underlayment rolls and ice-and-water shield
- Temporary tarps to protect the interior if work spans more than one day
Documentation: A thorough contractor photographs each stage: the damaged area before removal, the exposed framing, the new panels in place, and the finished re-roof. Those photos matter for insurance claims and for your own records.
Materials, thicknesses, fastening, and U.S. code basics
The right panel for your roof depends on rafter spacing and local code. Here's what typically applies:
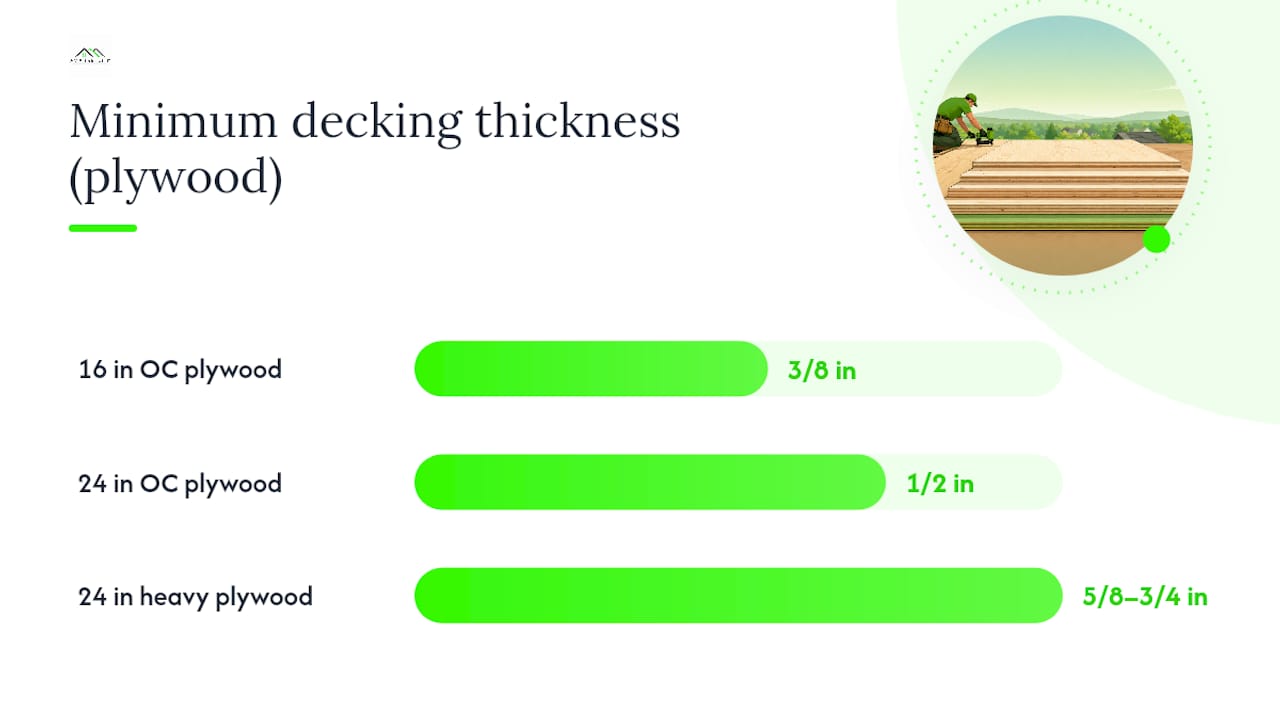
| Rafter spacing | Minimum panel thickness (OSB or plywood) | Common application |
|---|---|---|
| 16 inches on center | 7/16 inch (OSB) or 3/8 inch (plywood) | Most residential homes |
| 24 inches on center | 7/16 inch (OSB) or 1/2 inch (plywood) | Wider-span framing |
| 24 inches on center (heavy load) | 5/8 inch or 3/4 inch | Snow-load regions, heavier roofing |
Fastening basics. The IRC's Section R803 prescribes nail size, spacing, and edge distance for roof sheathing. Contractors typically use 8d common nails at 6-inch spacing on panel edges and 12-inch spacing in the field. Screws are used in some high-wind zones. Edge blocking is required wherever a panel's short edge doesn't land on a rafter.
Pro Tip: Ask your contractor to show you the fastening pattern before they cover the new sheathing with underlayment. Nails that miss the rafter or are spaced too far apart are a common shortcut that won't show up until the deck starts to move. USG's installation guidelines illustrate proper blocking and fastening detail for structural panels.
Specialty panels. USG STRUCTO-CRETE® and similar noncombustible panels are used in commercial builds or fire-rated assemblies, not typical residential re-roofs. If a contractor proposes a specialty substrate for a standard home, ask for the engineer's specification that requires it.
What roof decking replacement costs: ranges and main price drivers
Angi's national cost data is a useful benchmark for spotting outlier bids. Costs vary widely based on how much decking needs replacement, the material chosen, and local labor rates.
Typical cost ranges (professional installation):
Ranges reflect typical national figures for professional labor and materials. Wisconsin labor rates and permit costs affect your actual quote.
Main cost drivers:
- Extent of damage. More sheets replaced means more labor and material. Damage discovered after tear-off can expand scope quickly.
- Material choice. OSB costs less per sheet than plywood. Thicker panels cost more.
- Roof complexity. Multiple valleys, dormers, skylights, and steep pitch all add labor time.
- Disposal. Old sheathing goes in a dumpster. Disposal fees add to the total, especially for full re-sheaths.
- Permits. Many jurisdictions require a permit for structural sheathing replacement. Budget $100–$500 depending on your county.
- Local labor rates. Southeast Wisconsin rates differ from national averages. For Wisconsin-specific cost context, Am-exteriors's roof replacement cost guide breaks down local pricing.
Insurance. Homeowners insurance often covers decking replacement when the damage is caused by a covered peril (hail, wind, ice dam). It typically does not cover rot from deferred maintenance. Your contractor's photo documentation and written scope are what the adjuster uses to approve the claim. A contractor experienced with insurance claims, like Am-exteriors, can help you document damage correctly from the start.
How long a decking replacement job takes
Timeline depends on scope, weather, and what's found after tear-off.
A small patch, one or two sheets near a chimney or skylight, usually takes a few hours to a full day. The roofer tears off the shingles, removes the bad panel, installs the replacement, and re-roofs the section before leaving.
Partial re-sheaths covering one slope or a significant section run one to three days. Full re-sheaths combined with a complete reroof on an average-sized home typically take two to five days, depending on roof size, pitch, and complexity.
What slows a job:
- Rain or high winds. Exposed decking can't stay open overnight without a tarp.
- Concealed rot that expands the scope after tear-off. This is common and should be written into the contract as a contingency.
- Structural reinforcement needs. If rafters are also damaged, framing repairs add time before new sheathing can go down.
- Permit delays or insurance approval holds.
How to prepare: Clear the area around your home's perimeter for dumpster placement and material staging. Move vehicles out of the driveway. Protect landscaping near the eaves, since debris falls during tear-off. If the job runs more than one day, the contractor should tarp the exposed area each evening.
DIY vs. hiring a pro: what to ask and what to watch for
When DIY is reasonable. A single non-structural board on a low-slope section, accessible without climbing steep pitch, and not connected to an active leak or insurance claim is the outer limit of reasonable DIY. Anything involving rot that has spread to framing, multiple sheets, or a claim is a job for a licensed contractor.
Contractor questions to ask:
- Are you licensed and insured in Wisconsin?
- How do you determine the full extent of deck damage before writing the estimate?
- Do you provide photos and written documentation of the damaged and replaced areas?
- What sheathing material and thickness will you use, and why?
- What fastening pattern do you follow, and does it meet local code?
- What warranty covers your workmanship?
Red flags in estimates:
- No line item for decking in the written scope. If the estimate just says "reroof," ask specifically what happens if damaged sheathing is found.
- A very low bid with no mention of inspection or documentation. Contractors who skip the assessment step often skip the repair too.
- Pressure to reuse sheathing that a second opinion says should be replaced.
- No mention of underlayment or ice-and-water shield in the materials list.
- Poor communication about insurance documentation or unwillingness to provide photos.
Pro Tip: Get at least two written estimates with itemized line items. A bid that's significantly lower than others usually means something is being skipped, not that you found a deal. Ask each contractor to walk you through exactly what they'll do if they find more rot after tear-off.
Am-exteriors documents every inspection with photos, written measurements, and marked-up diagrams, which protects homeowners during insurance claims and gives a clear record of what was replaced and why.
How to prevent future decking damage
The most common causes of decking failure are fixable: poor ventilation, failed flashing, and ignored leaks.
Ventilation and attic moisture control. Warm, moist air rising from living spaces condenses on cold sheathing in winter. Over time, that moisture rots the deck from the inside out, with no visible leak at all. Check that your soffit vents are open and unblocked by insulation, and that ridge vents or gable vents are clear. A balanced intake-to-exhaust ratio keeps the attic dry. Am-exteriors's soffit and gutter repair service covers the eave-line components that affect airflow.
Flashing and ice-and-water shield. Most decking rot near chimneys, skylights, and valleys traces back to failed flashing. Step flashing that has lifted, counter-flashing that has cracked, or missing sealant at pipe boots lets water run directly onto the deck with every rain. Ice-and-water shield at eaves and valleys provides a secondary barrier when flashing fails or ice dams form.
Routine maintenance:
- Inspect the attic after every significant storm. Look for new water stains or wet insulation.
- Clear gutters and downspouts in fall and spring. Backed-up gutters push water under the eave edge and onto the deck.
- Repair any roof leak within days, not weeks. Water spreads laterally under shingles faster than most homeowners expect.
Pro Tip: Schedule a roof health inspection before winter and after any hail event. Catching a failed flashing or a cracked shingle in October costs far less than replacing rotted sheathing in March.
Am-exteriors handles roof decking replacement in Southeast Wisconsin
Am-exteriors has over 25 years of owner-operated roofing experience in Southeast Wisconsin, where hail, ice dams, and heavy snow routinely compromise roof decks. Every inspection includes photo documentation of damaged sheathing, written measurements, and a clear scope of work before a single shingle comes off. When insurance is involved, Am-exteriors handles the documentation and adjuster communication so homeowners aren't left navigating the claim alone.
Replacement work uses materials matched to your framing and local code, fastened to the pattern required by the IRC. Workmanship warranties back every project. Whether you need a two-sheet patch near a chimney or a full re-sheath ahead of a new roof, the process is the same: document, fix it right, and protect it properly.
Request a roof inspection or estimate to get a written assessment of your decking condition and a clear, itemized quote.
Am-exteriors' perspective on what actually causes decking failure
The three causes Am-exteriors sees most often in the field are failed flashing, inadequate attic ventilation, and leaks that were patched cosmetically but never properly fixed. Flashing failures are the most common: a chimney or skylight that was re-caulked instead of re-flashed will keep leaking, and the decking underneath keeps absorbing water until it rots through. Ventilation problems are quieter. There's no visible leak, just slow moisture accumulation in the attic that softens the sheathing over years.
The single most useful thing a homeowner can do is inspect the attic after every significant storm and before any re-roofing project. Bring a flashlight, press on the underside of the deck in a few spots near the eaves and around any penetrations, and photograph anything that looks discolored or soft. That five-minute check has caught serious structural problems before they became expensive surprises during tear-off.
Sources
These are the primary references used to build this guide:
- How Much Does Roof Decking Cost to Replace? 2026 Data (Angi)
- USG STRUCTO-CRETE® Brand structural roof deck field installation guidelines (SCP43)
- What Is Roof Decking (GAF)
- What is wood rot & when to replace roof sheathing (IKO)