
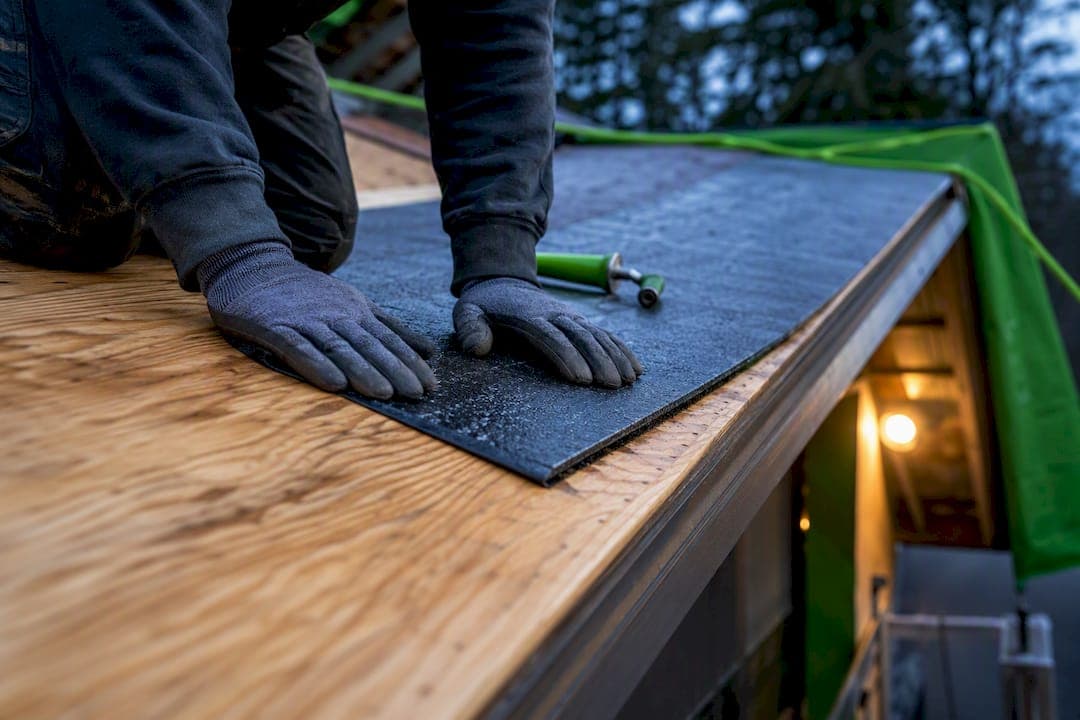
Ice and water shield is a self-adhering, waterproof membrane you install on eaves, valleys, and other vulnerable roof areas where ice dams or wind-driven rain can cause leaks. It's mandatory by code in many colder climates. Use it at eaves, valleys, penetrations, and low-slope transitions; full-deck coverage is worth the extra cost only on roofs with severe ice-damming history or complex geometry.
TL;DR:
- Installing ice and water shield at eaves, valleys, and penetrations with proper overlap and sealing is crucial for effective leak prevention.
- Code mandates a minimum of 36 inches of coverage on valleys and 24 inches inside the wall line at eaves where temperatures are below 25°F.
- Use self-adhering membranes that meet ASTM D1970 standards, with correct UV exposure, ripcord, and textured surfaces for safe installation.
- Proper surface preparation, correct sequencing, and sealing all penetrations are key to avoiding common failures like leaks or membrane damage.
- Reliance on skilled installation and thorough inspection after storms reduces callbacks due to deck issues or flashing errors more than membrane quality alone.
Table of Contents
- What Ice and Water Shield Is and Why It Beats Felt
- Where Code Requires It: Eaves, Valleys, and Beyond
- What to Check on the Label Before You Buy
- How to Install Ice and Water Shield the Right Way
- Cost, Common Failures, and What to Inspect After a Storm
- A Contractor's Honest Take on DIY vs. Hiring a Pro
- Get a Professional Roof Assessment From Am-exteriors
- Primary Sources and Standards
- Sources
What Ice and Water Shield Is and Why It Beats Felt
Ice and water shield is a rubberized asphalt or polymer-modified bitumen sheet laminated to a polyethylene film, with a release liner on the adhesive side. Peel off the liner, press it onto the deck, and the membrane bonds directly to the wood instead of just resting on top of it the way felt does.
That direct bond is the whole point. Standard felt underlayment sheds water downhill, but it does nothing once water backs up under shingles from an ice dam or blows sideways in a storm. Ice and water shield seals around roofing nails driven through it, closing the puncture instead of leaving an open channel for water to travel. Manufacturer testing on products like Grace Ice & Water Shield confirms this self-sealing behavior around fasteners, along with watertight side and end laps when installed correctly.
For most homes, a hybrid approach makes the most financial sense: install ice and water shield at the eaves, valleys, skylights, chimneys, and any low-slope section, then run felt or synthetic underlayment across the rest of the field. This gets you protection where leaks actually originate without paying membrane prices for square footage that rarely sees standing water.
Reasons the hybrid method holds up on real roofs:
- Concealed leaks under shingles almost always start at transitions, not the open field.
- Ice dams form at eaves, exactly where the membrane goes.
- Valleys concentrate more runoff per square foot than any other roof plane.
- Full-deck membrane raises material cost with limited added benefit outside high-risk zones.
Pro Tip: If your attic has a history of icicles hanging off the gutters every winter, that's your roof telling you where the ice dam forms. Match your membrane coverage to that exact spot, not just the code minimum.
Where Code Requires It: Eaves, Valleys, and Beyond
The International Residential Code requires an ice barrier under Section R905.2.7.1 in any location where the average January daily mean temperature is 25°F or below. Where that trigger applies, the barrier must extend from the eave edge to at least 24 inches inside the interior wall line, measured along the roof slope.
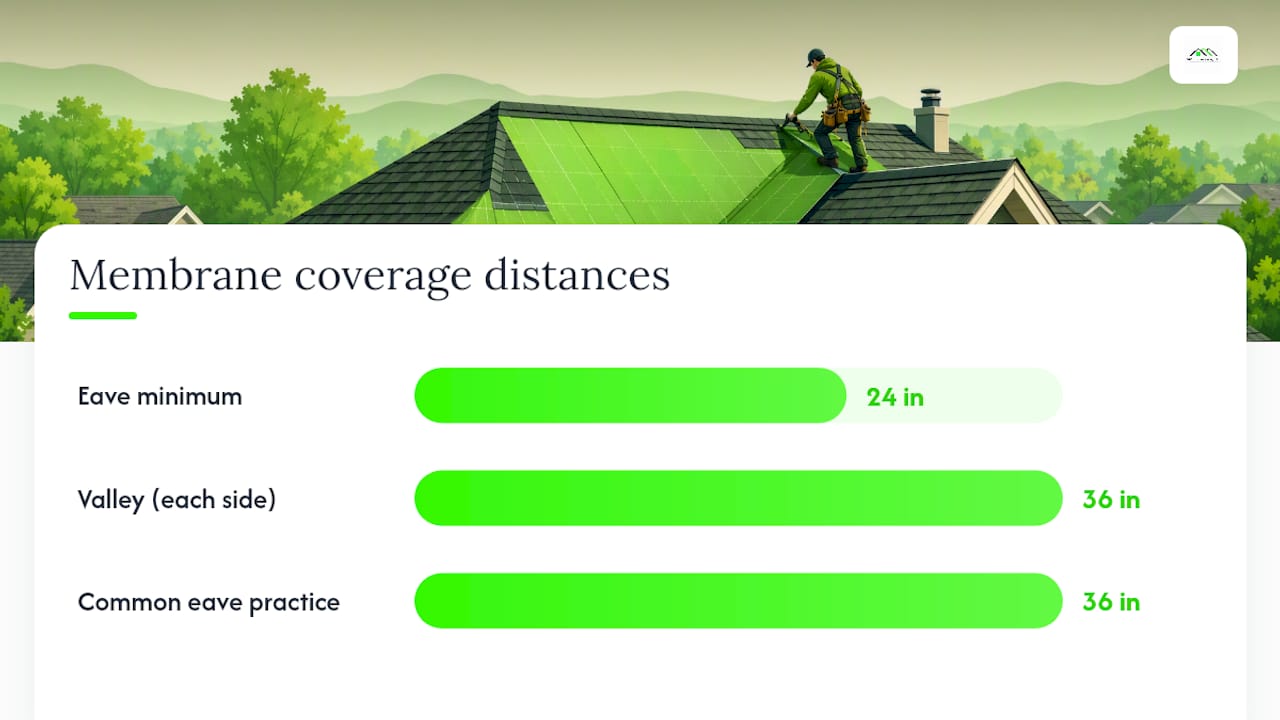
Valleys need more coverage than eaves. Code and common practice both call for at least 36 inches of membrane on each side of the valley centerline, since valleys channel far more water than a flat plane. Many roofers extend eave coverage to about three feet anyway, especially in regions with a documented ice-damming history, because the code minimum assumes ideal conditions that don't always hold.
Beyond the code-mandated zones, best practice adds ice and water shield at:
- Skylight curbs and chimney bases, where flashing alone often fails over time
- Any roof penetration (vent pipes, HVAC curbs, satellite mounts)
- Low-slope sections under 3:12 pitch, where water drains too slowly for shingles alone to shed it
Statistic Callout: The 25°F January mean threshold in IRC R905.2.7.1 isn't a suggestion. Jurisdictions that meet it enforce the ice barrier requirement at final inspection, and skipping it can hold up a certificate of occupancy or complicate an insurance claim after storm damage.
Local code sometimes exceeds the IRC baseline, and shingle manufacturer warranties often specify their own minimum coverage. Check both before you buy material, since UpCodes also lists two cemented layers of underlayment as an alternative acceptable method where a self-adhering sheet isn't used.
What to Check on the Label Before You Buy
Not every roll marketed as "ice guard" or "ice shield" meets code. The label should reference ASTM D1970, the standard for self-adhering polymer-modified bitumen sheet ice barriers. That designation, along with an ICC-ES evaluation report number, is what your local inspector will look for if the work gets checked.
Rolls typically run 36 inches wide by 33 to 75 feet long, covering roughly 2 squares (200 square feet) per roll depending on the manufacturer. Measure your eave length and valley footage in linear feet, multiply by the required coverage width, then divide by roll square footage to get an accurate order quantity. Order 10% extra for waste and laps.
Features worth prioritizing on the product page or datasheet:
- A split-release ripcord liner, which speeds installation and reduces the chance of the sheet sticking to itself
- A slip-resistant granular or textured surface, since you'll be walking on it before the roofing goes down
- A stated UV exposure window (often 30 to 90 days) if the membrane will sit exposed before shingles go on
- Cold-weather adhesive formulations if you're installing in late fall or winter
How to Install Ice and Water Shield the Right Way
Getting the substrate right matters more than any other step in the process. Here's the sequence that holds up over time:
- Clean and dry the deck. Sweep off debris, and confirm the sheathing is free of frost, dew, or standing moisture. IKO's installation guidance is blunt about this: membrane bonded to a wet or frosty deck will not adhere properly, full stop.
- Install drip edge first if your local code or shingle warranty requires it at the eave, then run the first membrane course over it.
- Check temperature before you unroll anything. Most self-adhering membranes need a minimum surface and air temperature (commonly 40°F, check your product's datasheet) to bond correctly. In colder conditions, warm the roll in a heated space or vehicle before application, and consider temporary cap nails to hold the sheet while the adhesive sets.
- Lay courses starting at the eave, working up. Overlap side laps at least 3 inches and end laps at least 6 inches, always shingled so upper courses cover lower ones.
- Double up in valleys. Run one course up each side, then a center course over the valley itself so water never crosses an exposed seam.
- Seal every penetration. Cut, fit, and press the membrane tight around pipes and vents, then integrate with step flashing and counter-flashing rather than relying on sealant alone.
- Use cap nails for any synthetic underlayment installed over the membrane, and keep fastener patterns tight near edges and laps.
The most reliable roofs aren't the ones with the fanciest membrane. They're the ones where flashing, decking, and underlayment were sequenced correctly the first time. Field failures almost always trace back to a shortcut in prep, not a defect in the material.
Pro Tip: If you find soft, spongy decking, widespread rot, or a roof steep enough that you need fall protection to work safely, stop and call a licensed contractor. Those conditions turn a weekend project into a liability.
Cost, Common Failures, and What to Inspect After a Storm
Material-only cost for ice and water shield is generally higher than felt and varies based on brand and thickness. That's higher than felt, but you're only buying it for eaves, valleys, and penetrations in most homes, which keeps the total add-on cost manageable for a full reroof.
Most reported "membrane failures" aren't the membrane's fault. The usual culprits:
- Adhesive applied to a deck that was damp, frosty, or contaminated with sawdust
- Insufficient overlap at side or end laps, leaving a gap for capillary water to travel
- Flashing installed after the membrane instead of integrated with it, creating a reverse lap that funnels water backward
- Membrane pulled taut or wrinkled during installation, which stresses the seal over time
Statistic Callout: Field observations from professional reroofing work consistently point to deck preparation and flashing sequencing, not the membrane itself, as the leading cause of underlayment-related callbacks. Getting those two steps right resolves the vast majority of leak complaints traced back to underlayment.
After any major storm, check attic sheathing for new water stains, inspect valley and eave metal for lifted edges, and look for granule loss concentrated near penetrations. If you see recurring icicles or ice dams despite properly installed membrane, the issue is usually ventilation or insulation, not the water barrier. Heat escaping into the attic melts snow from below, and the membrane is only your backup plan, not the fix for that root cause.
A Contractor's Honest Take on DIY vs. Hiring a Pro
Over 25-plus years of owner-operated roofing work, the pattern repeats: most callbacks trace to rushed prep, not bad material. Homeowners who DIY eave and valley sections on simple gable roofs with good access generally do fine if they follow temperature guidance and lap sequencing carefully.
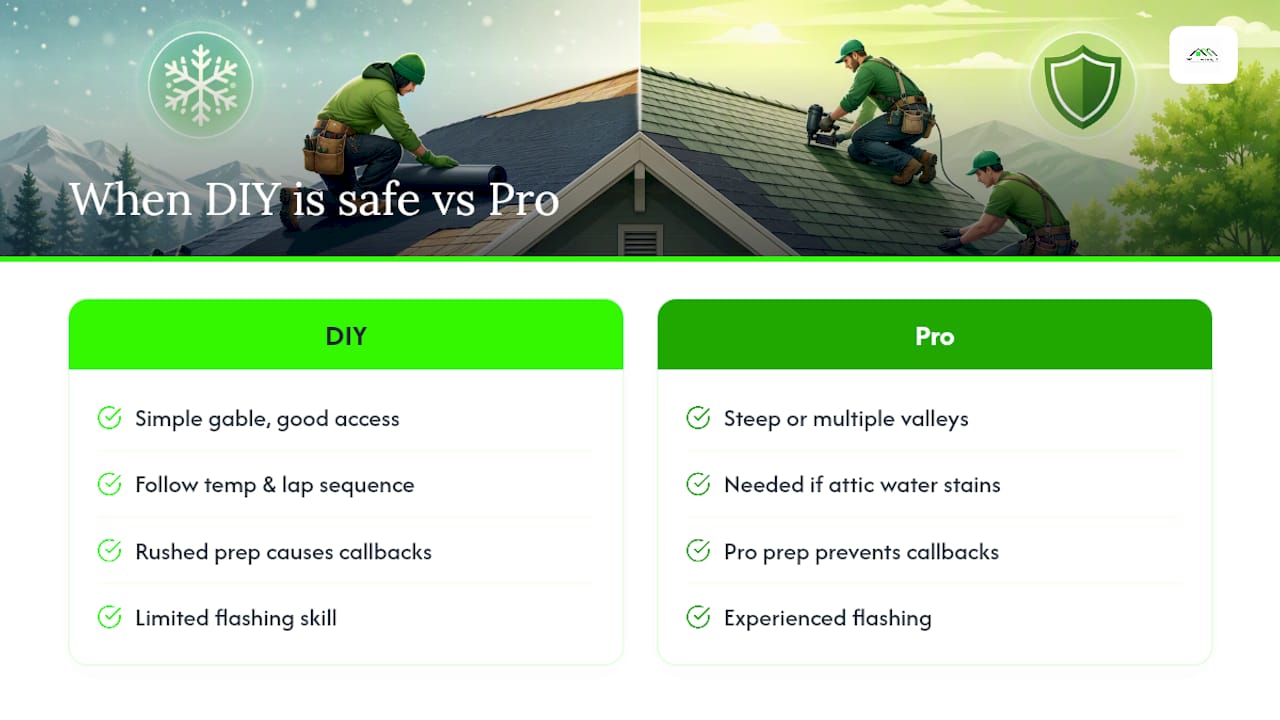
Where it gets risky is steep pitches, multiple valleys converging near a chimney, or any roof with existing water staining in the attic. Those jobs need experienced flashing work that's hard to learn on your first attempt, and a full roof replacement may already be overdue if decking has softened underneath.
Professional crews also document every layer with photos before it's covered, which matters enormously if you ever file an insurance claim for storm damage. That paper trail is often the difference between a smooth claim and a denied one.
— Heather
Get a Professional Roof Assessment From Am-exteriors
If your roof has a history of ice dams, valley leaks, or you're just not confident diagnosing deck condition before winter, Am-exteriors gives Southeast Wisconsin homeowners a faster path to a dry roof than trial-and-error DIY membrane work. Every reroof includes targeted ice and water shield placement at eaves, valleys, and penetrations as standard practice, backed by manufacturer warranties and full documentation of every layer installed.

That documentation matters twice: once for your own records, and again if storm damage forces an insurance claim, where Am-exteriors handles the adjuster conversation directly instead of leaving you to interpret code requirements on your own. Whether you need a full roof replacement or just eave and gutter repair after a rough winter, request an inspection and get a straight answer on what your roof actually needs before the next storm rolls through.
Primary Sources and Standards
- IRC 2018 R905.2.7.1 ice barrier code requirements
- ASTM D1970 manufacturer data sheet
- IKO installation guidance for ice and water protectors
- UpCodes ice barrier reference
- Weatherproofing and energy-loss guidance
Sources
- Ice Barrier Code Requirements: IRC 2018 R905.2.7.1 Explained | Jaspector
- Ice and Water Protector: What is it, Where is it Installed & Why - IKO
- Ice Barriers | UpCodes