
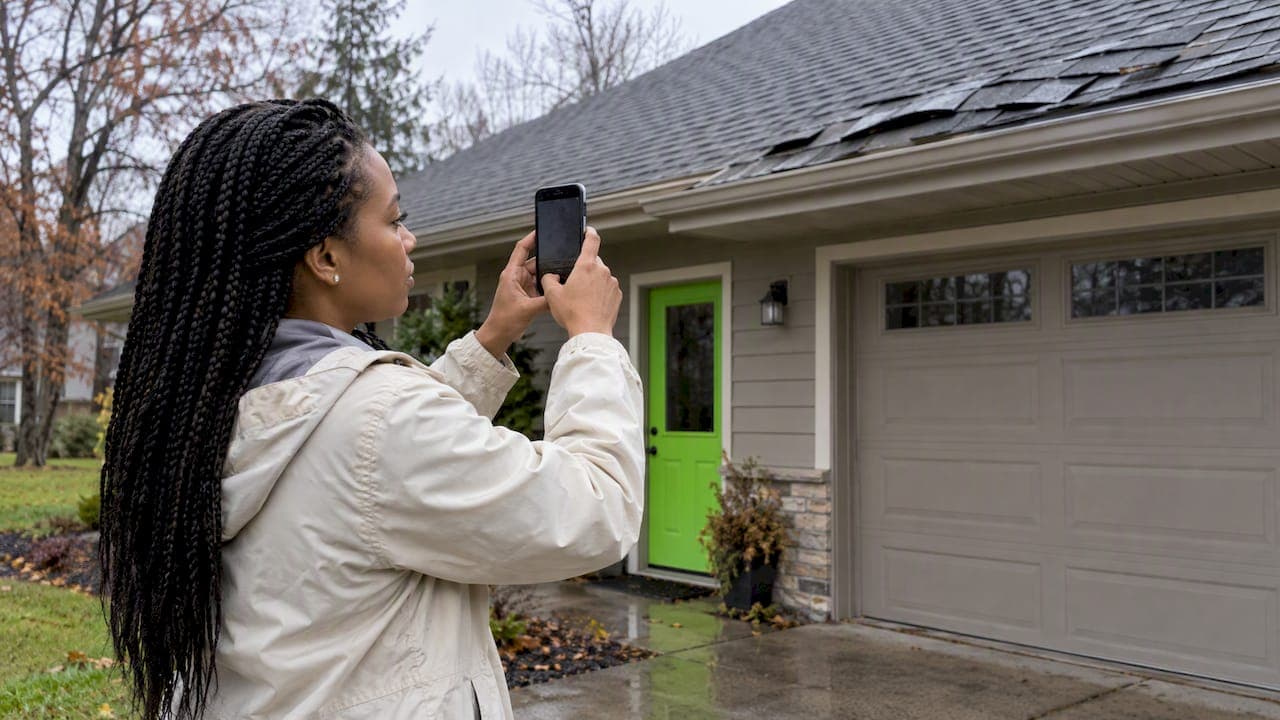
Take photos from the ground first. Shoot wide, then mid-range, then close. Cover every side of the house, every roof slope you can see safely, the gutters, the siding, the windows and any water inside. Do this before you clean up or make repairs. This checklist shows the exact shots, in order, so your insurer and your roofer can see what you see.
TL;DR
- Wait until it is safe. Stay off the roof. Shoot from the ground, a window or a ladder-free vantage point.
- Take three distances of every area: wide, mid-range, close-up. Put a coin or ruler next to hail hits.
- Photograph before cleanup. Cover outside, inside and damaged belongings.
- Name and store files in one labeled folder. Keep receipts and a call log with them.
- Call your insurer, then a roofer for the areas you cannot reach.
Table of Contents
- Before you take a single photo: safety
- What to have ready
- The roof damage photo checklist
- How many photos is enough?
- Record the details with each photo
- Document first, then protect the home
- Send photos to your insurer
- When to call a roofer
- Common photo mistakes
- Perspective
- Need help documenting storm damage?
- FAQ
- Sources
Before you take a single photo: safety
Photos matter. A fall matters more. FEMA's preparedness guide says to wait until authorities say it is safe, then check for downed power lines, gas leaks, broken glass and structural damage. It also says a qualified inspector should assess a building that may be unsafe before you go in.
Apply that to the roof:
- Do not climb a wet, steep or visibly damaged roof.
- Stay away from sagging areas, hanging debris and anything near power lines.
- Do not stand under loose shingles, branches or gutters.
- If you smell gas or see a line down, leave and call the utility or 911.
- Skip any area you cannot see from solid ground. Ask a roofing professional to document it.
A phone zoom, a camera with a long lens or a steady view from an upstairs window shows a lot. Use them.
What to have ready
You do not need special gear.
- A phone with enough storage and battery
- A coin or tape measure for scale
- A notepad or notes app for time, date and weather
- Chalk, only if you can mark a spot safely from the ground
- A flashlight for attics, closets and dark ceilings
Turn on date and location stamps in your camera settings if your phone offers them. Do not edit, crop or filter the originals. Keep the untouched files.
The roof damage photo checklist
Work in this order. Each step builds context for the next.
1. Start with the whole property
- Street view of the house
- One wide shot of each of the four sides
- Any trees, fences, sheds or cars with storm damage nearby
- Debris on the ground, before you move it
Wide shots show location and extent. Without them, a close-up of a torn shingle could be from any house. Amica's claims guidance makes the same point: wide images plus close-ups tell the full story.
2. Photograph each roof slope you can see
Treat every slope as its own set. Take:
- Wide: the whole slope in one frame
- Mid-range: the area with the damage
- Close-up: the damaged spot itself
Label each slope in your notes: front, back, left, right, garage, porch, dormer. Keep the same names for every photo.
3. Shoot the roof details
These spots fail first and get missed most:
- Ridge caps
- Valleys
- Eaves and drip edge
- Pipe boots and vents
- Chimney and flashing
- Skylights
- Satellite dish mounts and other add-ons
Photograph each one separately. Each roof penetration is its own repair item, and a missing photo can leave that item unsupported in the file.
4. Capture the damage types
| Damage | What to photograph | Scale tip |
|---|---|---|
| Missing shingles | The bare patch, exposed underlayment, loose pieces on the ground | Wide shot showing the patch on the slope |
| Lifted or curled tabs | Edges of tabs, from a low angle | Side light shows lift |
| Creased shingles | Horizontal creases across tabs after high wind | Close-up at a slant |
| Hail hits | Bruises, granule loss, dents in vents, flashing and gutters | Coin or ruler beside the mark |
| Cracked or torn material | The full tear plus surrounding area | Mid-range then close |
| Debris impact | The object, the impact point and the damage | Wide shot linking the two |
Soft metals show hail well. Check vents, flashing, gutters, downspouts and the metal on your AC unit. Dents on those back up what you see on the shingles. For more on this, read our guide to hail damage signs to photograph for claims and our hail storm roof inspection checklist for Wisconsin homes.
Wind is different. Look for missing tabs, lifted edges and creases. Our page on what to do after wind damage to a roof covers it.
5. Check the rest of the exterior
The roof is rarely the only thing hit. Photograph:
- Gutters and downspouts: dents, pulled-away sections, clogged granules
- Fascia, soffit and trim: cracks, gaps, missing pieces
- Siding: dents, holes, cracks, splits, spatter marks
- Windows and screens: cracked glass, torn screens, damaged frames
- Doors, garage doors, decks and fences
- Outdoor lights, mailboxes, AC units
Amica's guidance lists the roofline, siding, windows and gutters as areas to document outside. Treat that as the minimum.
6. Go inside
Water shows up inside before you see it outside. Check:
- Ceilings and upper-floor walls for stains, bubbles or sagging
- Attic: wet insulation, daylight through the deck, dark wood
- Around light fixtures, vents and chimneys
- Window sills and frames
- Floors and belongings under any leak
Shoot a wide shot of the room, then the stain, then the source if you can see it. Photograph damaged belongings where they sit, then list them. Do not throw damaged items away until your adjuster agrees. The Wisconsin Office of the Commissioner of Insurance tells homeowners to take photographs before cleanup and to keep every receipt.
7. Add a short walkthrough video
When it is safe, walk the outside of the house and then the affected rooms. Narrate what you see. Say the date and time. Keep it under a few minutes. A video fills gaps between photos and shows how the damage connects.
How many photos is enough?
There is no official number. Some contractor sites suggest 60 or more for a full roof. Use that as a rough guide only. The rule is simpler: every slope, every detail, every damaged item, at three distances. A small, one-slope repair may need 25 photos. A full hail event may need well over 60. Take more than you think you need. Storage is cheap. A return trip after the roof is tarped is not.

Record the details with each photo
A photo shows what. Your notes show when and why. Keep a simple log:
- Date and time of the storm
- Type of event: hail, wind, tree fall, ice
- Date and time you took each set of photos
- What you saw and where
- Who you spoke to, when, and what they said
- Any temporary repairs and their cost
FEMA's guidance for filing a home insurance claim says to document the date, time, cause and damage, list damaged or missing items, give photos or videos, and save receipts.
Name and organize your files
Create one folder, digital or paper, and keep everything there. The American Homeowners Association recommends a dedicated, labeled folder holding photos, a communications log, an expense log, adjuster reports and contractor paperwork.
Use file names that sort. For example:
2026-07-28_RoofFront_Wide_01
2026-07-28_RoofFront_Close_02
2026-07-28_Chimney_Flashing_03
Add your claim number once you have it. Back up the folder to a second place: cloud storage, a USB drive or a fire-resistant box. If you want a home-records plan for the rest of your documents, this home protection planning guide covers storing papers and backups.

Document first, then protect the home
Order matters. The NAIC advises documenting losses before you remove debris or belongings, then taking reasonable steps to prevent further damage, such as covering a roof opening or boarding a broken window. Keep the receipts for those steps.
The Insurance Information Institute adds that temporary repairs should protect the property, while extensive permanent repairs should wait until the adjuster has assessed the damage.
In practice:
- Photograph the damage.
- Tarp or board what is open to weather.
- Photograph the temporary repair.
- Save every receipt.
- Hold off on permanent repairs until the adjuster has seen the damage.
If you have an open roof or active leak, read what to do in the first hour with an emergency roof tarp. Do not tarp a roof yourself in rain, wind or ice. A tarp job needs a person with fall protection.
Send photos to your insurer
Call or file online as soon as you can. The AHA toolkit stresses that action in the first 48 hours, including photos, notifying the insurer and documenting everything, sets up a smoother claim.
Have ready:
- Policy number and insurer contact details
- Date, time and cause of loss
- Photos and video
- A list of damaged items
- Your expense receipts
When the adjuster visits, walk the property with them. Triple-I says to point out all structural damage and keep a record of all communications. Show them the spots on your list. Hand over copies of your photos. Keep the originals.
For the full Wisconsin process, see our guide to filing a storm damage insurance claim in Wisconsin. If your roof's age affects coverage, our page on proving roof age with a contractor checklist helps. Hail may be cosmetic or functional, and the difference matters to a claim. See cosmetic vs. functional hail damage.
When to call a roofer
Photos do not replace an inspection. FEMA and the NAIC both treat photographs as supporting evidence, not a substitute for a safety check or the insurer's adjustment. Call a qualified roofing professional when:
- You cannot see parts of the roof from the ground
- The roof deck looks sagging or the structure may be unsafe
- Water is coming in
- You need a tarp or other emergency protection
- You want someone at the adjuster meeting who can explain the damage
A good roofer documents what you cannot reach, with the same wide, mid-range and close-up method. Pick one carefully. Our guide to choosing a roofing contractor in Wisconsin lists what to check. Read the contract before you sign it. This overview of what a roofing contract should include explains the parts to look for. And do not choose on price alone: see why the cheapest bid is almost never the cheapest roof.
Common photo mistakes
- Only close-ups. There is no way to tell where the damage is.
- Only wide shots. The damage is too small to see.
- Photos after cleanup. Debris and removed material are evidence.
- No scale. A hail dent without a coin looks like nothing.
- Blurry or dark images. Retake them. Use daylight.
- Missing the back slopes. Damage is often uneven across slopes.
- Scattered files. Photos in six apps and three texts get lost.
- Editing. Filters and crops raise questions. Keep originals.
Perspective
We see the same problem on many storm calls. The homeowner has 8 close-up photos and no wide shots. The insurer cannot tell which slope the damage is on. Fixing it means another visit and another delay.
Our view is simple. Document in layers, stay off the roof, and let a professional handle what you cannot reach. We are owner-operated, and we have worked in Southeast Wisconsin for over 25 years. We believe most roof failures come from poor installation, not materials. The same goes for claims: the quality of the work and the quality of the paperwork decide how the project goes.
When we inspect, we document each slope and detail, keep clear records and explain what we find. We also give honest repair vs. replacement advice. Sometimes a repair is enough. Sometimes it is not. Either way, you should see the evidence.
We can meet your adjuster on site and walk through the damage with you.
Heather
Need help documenting storm damage?
We inspect storm-damaged roofs across Dodge, Washington, Fond du Lac and Ozaukee counties and the rest of Southeast Wisconsin. We document the roof, explain what we find and help you through the insurance claim process. Our roof replacement page lists our roofing services, including storm damage roofing and roof repair. Published roof replacement pricing runs from $7,500 to $18,000.

Need help with a claim? See our insurance claim services. Have an active leak? Our emergency roof repair page shows how we respond. For budgeting, read the roof replacement cost guide for Wisconsin.
FAQ
Should I go on the roof to take photos?
No. Take photos from the ground, a window or a safe vantage point. FEMA advises against entering unsafe structures until a qualified inspector has assessed them. Ask a roofing professional to document anything you cannot see.
How soon after a storm should I take photos?
As soon as it is safe, and before cleanup or repairs. The American Homeowners Association says the first 48 hours are key for photos, notifying the insurer and documenting everything. Do not wait for the adjuster to start your own record.
What should I photograph inside the house?
Photograph ceiling and wall stains, drips, wet insulation in the attic, damaged floors and affected belongings. Take a wide shot of the room first, then close-ups. Save any receipts for items you replace or protect.
Can I make temporary repairs before the adjuster comes?
Yes, if they protect the home from more damage, such as covering a roof opening. Photograph the damage first, photograph the repair and keep the receipts. Leave permanent repairs until the adjuster has assessed the loss.
Sources
- Are You Ready? An In-Depth Guide to Citizen Preparedness (FEMA)
- How to Document a Home Insurance Claim (Amica)
- Insurance Commissioner Shares Tips for Wisconsinites Impacted by Storm Damage (Wisconsin OCI)
- What information do I need to file a home insurance claim? (FEMA)
- AHA Homeowners Insurance Claim Prep & Documentation Toolkit
- Consumer Insight: After a storm, read the fine print (NAIC)
- Settling insurance claims after a disaster (Triple-I)
- Roofing contract template: what to include
- Comprehensive home protection planning guide