
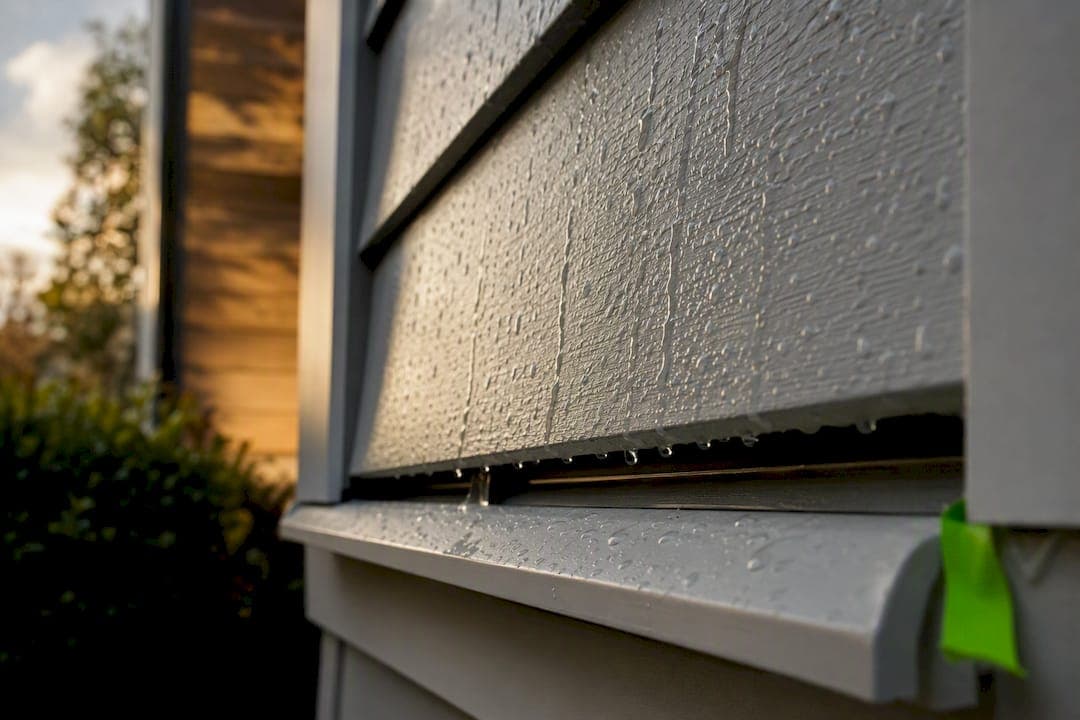
Fiber cement siding maintenance comes down to four habits: inspect twice a year, wash gently every 6 to 12 months, fix small damage before it spreads, and keep water moving away from the wall. Follow James Hardie's cleaning limits, respect the drainage principles building scientists have documented for years, and most boards will outlast the mortgage. Skip any one of those four, and even premium siding starts failing early.
TL;DR:
- Regular inspections should be conducted twice a year to identify small issues before they escalate into costly repairs.
- Use a garden hose and soft brush for cleaning, avoiding high-pressure washers that can damage the siding’s finish or drive water behind panels.
- Address small cracks, chips, or caulk deterioration promptly with manufacturer-approved patches and caulks to prevent water intrusion.
- Focus on maintaining drainage and ventilation, such as checking gutters, grading slopes, and ensuring flashing and weep holes are clear, to control moisture effectively.
- Hire a professional inspector if moisture problems or significant damage are suspected, since improper repairs can void warranties and cause larger issues.
Table of Contents
- How Often to Inspect and Clean Fiber Cement Siding
- Cleaning Fiber Cement Siding Without Damaging It
- What to Look for During a Siding Inspection
- DIY Repairs: Patching, Caulking, and Touch-Up Painting
- When to Call a Professional Instead of DIY-ing It
- Why Moisture Control Matters More Than Cleaning
- Field Notes From Wisconsin Siding Installations
- The Maintenance Habit Most Homeowners Skip
- Get a Professional Siding Inspection From Am-exteriors
- Sources
- FAQ
How Often to Inspect and Clean Fiber Cement Siding
A working schedule beats a vague one. Fiber cement siding care follows a predictable rhythm, and most failures trace back to a skipped step rather than a defective board.
- Inspect twice a year (spring and fall), walking the full perimeter and checking joints, flashings, caulk lines, fasteners, trim, and paint condition for chalking or flaking.
- Wash approximately twice a year, or as needed based on local conditions. James Hardie and Home Depot both recommend this window, more often in shaded, humid, or coastal spots.
- Check after every major storm. Look for loose panels, cracked caulk, or debris jammed against the base.
- Clear vegetation and landscaping at least a foot back from the wall, keep gutters flowing, and confirm sprinkler heads never spray directly on the siding.
- Maintain 6 inches of ground clearance between soil or mulch beds and the bottom edge of the siding, a threshold Nichiha's maintenance guidance also flags.
- Plan for repainting every several years depending on sun exposure and original paint quality, per Home Depot's guidance. Faded but intact paint usually only needs a touch-up, not a full recoat.
That sequence, done consistently, is the backbone of fiber cement siding durability. Nothing on it requires special tools.
Cleaning Fiber Cement Siding Without Damaging It
A garden hose and a soft, nonmetal brush handle 90 percent of routine fiber cement siding cleaning. Work top to bottom in overlapping passes, rinsing as you go, so dirty runoff never dries on a section you already cleaned.

Pressure washers are where homeowners get into trouble. James Hardie's guidance is specific: use a wide fan tip, stay at least 6 feet from the surface, and never exceed 1,500 psi. Push past that and you risk driving water behind panels or stripping the factory finish, which can also affect warranty coverage.
For mildew or algae, mix a mild detergent solution and scrub gently. To confirm its mildew and not surface staining, dab a small amount of diluted bleach on the spot. If it lightens, you're dealing with mildew, not efflorescence or dirt.
- Never use acid-based cleaners, ammonia concentrates, or abrasive scouring pads.
- Test any new cleaner on a hidden section first and let it sit a few minutes before judging results.
- Rinse thoroughly. Leftover detergent film attracts dirt faster than the grime it removed.
- For chalky white deposits (efflorescence), Nichiha's technical documentation recommends a manufacturer-approved remover rather than scrubbing harder.
Pro Tip: Wash on an overcast day, not in direct afternoon sun. Cleaner dries too fast on hot siding and leaves streaks you'll end up scrubbing twice.
What to Look for During a Siding Inspection
Most fiber cement siding repairs start as something small a homeowner noticed on a Saturday morning walk-around. Catching these early is the difference between a $20 tube of caulk and a contractor visit.
- Chips, dents, or hairline cracks, usually from lawn equipment, hail, or ladder contact.
- Chalking or flaking paint, a sign the finish coat has reached the end of its service life.
- Cracked or shrunken caulk at joints, window trim, and corner boards, which lets water track behind the panel.
- Loose or corroding fasteners, often visible as slight panel movement or rust streaks running down from a nail head.
- Staining or white efflorescence, which points to moisture reaching the board's surface repeatedly.
- Mold or mildew patches, typically on north-facing or shaded walls that stay damp longer.
A stain that reappears weeks after cleaning usually means water is finding a path behind the siding, not just sitting on top of it. That's different from a one-time paint chip from a stray baseball. If you suspect the substrate underneath is soft, press gently with a fingertip or the back of a screwdriver handle. Photograph anything questionable next to a tape measure so you can track whether it's growing over the following months.
DIY Repairs: Patching, Caulking, and Touch-Up Painting
Small damage on fiber cement siding is genuinely repairable without a contractor, provided you follow the sequence manufacturers actually recommend.
- Clean and dry the area completely. Any trapped moisture will push a patch or caulk bead right back out.
- Choose the right material. Cementitious patching compound suits chips and small holes; flexible acrylic exterior caulk (ASTM-compliant, per Allura's technical bulletin) handles joints and seams.
- Apply and smooth the patch or caulk, then let it cure fully per the product label before sanding lightly.
- Prime bare or patched areas, then finish with 100% acrylic latex paint. Oil-based or alkyd paints don't flex with the board and tend to crack prematurely.
- Match sheen and color as closely as possible; touch-ups blend better when applied in thin coats rather than one heavy layer.
Stop and call a professional once damage exceeds a small chip, roughly the size of a quarter, or when you find soft, saturated substrate underneath. Nichiha's own maintenance instructions draw that same line: patch small, replace larger.
Pro Tip: Keep a labeled sample of your exact paint color and sheen in a sealed jar in the garage. Touch-ups done years apart with mismatched paint are more visible than the original damage.
When to Call a Professional Instead of DIY-ing It
Some damage isn't worth risking on your own, and getting it wrong can cost more than the repair itself.
- Multiple adjacent boards showing damage, rather than one isolated spot.
- Any sign of moisture intrusion, rot, or a musty smell coming from an exterior wall.
- Compromised or missing flashing around windows, doors, or roof lines.
- Cracks or holes larger than a few inches, or damage that keeps reappearing in the same location.
A qualified inspector checks moisture content with a meter, examines flashing details, and looks at the housewrap or drainage plane behind the panels, not just the visible surface. That matters because surface repairs on top of a failing drainage plane just mask a bigger problem. Document everything you find, including dates and photos. Following manufacturer repair specifications also matters for warranty purposes; deviating from approved methods can void coverage you're otherwise entitled to. If you're weighing repair against full replacement, a siding repair specialist can walk the wall assembly with you before you spend money either way.
Why Moisture Control Matters More Than Cleaning
Fiber cement is a reservoir cladding, meaning it absorbs water rather than shedding it entirely, which is why Building Science Corporation's guidance calls for a drainage plane and a ventilated air space behind every installation. Without that gap, moisture that gets behind the panel has nowhere to go, and it can sit against the sheathing instead of drying out.
Homeowners can verify most of this without opening a wall:
- Gutters and downspouts actually redirect water away from the foundation, not just off the roof edge.
- Grading slopes away from the house rather than pooling against the base of the siding.
- Weep holes and vents at the bottom of the wall stay clear of caulk, paint, or debris.
- Sprinklers never hit the siding directly, even on a timer schedule.
Continuous flashing and drainage plane integrity, laid out in BSC's Information Sheet 301, are what actually route water down and out. If you find a blocked drainage space or a flashing gap you can't fix from the outside, that's a job for a contractor, not a caulk gun. A waterproofing membrane plays a similar role at the foundation level, keeping bulk water out of an assembly that's designed to dry, not stay wet.
Field Notes From Wisconsin Siding Installations
Installation quality decides fiber cement siding lifespan more than any cleaning routine ever will. On every inspection, Am-exteriors checks fastener placement, flashing laps, and drainage gap clearance first, because that's where poor original workmanship tends to hide.

Wisconsin weather adds its own stress test. After hail or high wind, walk the exterior and check for loosened fasteners, dented trim, or flashing that's pulled away at a seam. Snow load and ice buildup near rooflines put extra pressure on trim and soffit connections, so those areas deserve a second look each spring. When storm damage crosses into insurance territory, Am-exteriors documents the damage and helps homeowners navigate the claim, which is often the part of the process that causes the most frustration when handled alone.
The Maintenance Habit Most Homeowners Skip
Cleaning gets attention because it's visible. Moisture management gets ignored because it's invisible, and that's backwards. A wall assembly with a working drainage plane and clear vents will tolerate a missed washing or two. A wall with blocked drainage and a perfect paint job is still failing behind the surface.
The conventional advice treats fiber cement siding maintenance as a cosmetic task: wash it, paint it when it fades, patch a chip here and there. That's not wrong, but it's incomplete. The manufacturers themselves, James Hardie, Allura, and Nichiha, all converge on the same underlying point once you read past the cleaning instructions: sealants, flashings, and drainage paths are what actually determine whether the board underneath survives.
If you only have time for one seasonal task, make it the drainage check, not the wash. Confirm gutters are clear, grading slopes away from the foundation, and no sprinkler head is soaking the base of a wall. Everything else on the maintenance list extends the finish. That one habit protects the substrate.
— Heather
Get a Professional Siding Inspection From Am-exteriors
If a DIY check turns up something you're not sure about, a professional look costs nothing but a phone call, and it's the fastest way to know whether you're looking at a $30 caulk fix or a bigger issue behind the wall. The company installs and repairs fiber cement and vinyl siding and provides inspections that include documented findings you can keep for your own records or an insurance claim.

Owner-supervised crews provide consistent standards for diagnosing siding issues, which is important when hail or wind damage is involved and insurance paperwork gets complicated. Whether you need a quick repair, a full James Hardie siding replacement, or just a second opinion on a stain you can't explain, request an estimate through the siding services page and get a straight answer before the damage spreads.
Sources
Manufacturer instructions take priority over general advice whenever they differ, since warranty terms are tied to their specific steps. For deeper technical detail, see James Hardie's cleaning guidance, Allura's care and maintenance bulletin, Nichiha's maintenance instructions, BSC's reservoir cladding paper, and Home Depot's maintenance overview.
- How to Clean Siding on your House | James Hardie
- Allura Technical Bulletin M03.A — Care & Maintenance
- BSC Information Sheet 305 - Reservoir claddings
- NichiBoard maintenance instructions (Nichiha)
- How to Maintain Fiber Cement Siding | The Home Depot
FAQ
What Is the Most Common Problem With Fiber Cement Siding?
Failed caulk and cracked joints are the most frequent issue, since sealant hardens and shrinks over time and lets water track behind the panel. Left alone, this leads to staining, efflorescence, or soft substrate, which is why manufacturers like Allura recommend re-caulking as soon as sealant shows cracking.
Can You Power Wash Fiber Cement Siding?
Yes, but with strict limits: use a wide fan tip, stay at least 6 feet from the surface, and never exceed 1,500 psi, per James Hardie's guidance. Anything narrower or closer risks stripping the finish or forcing water behind the boards.
Can You Use Dawn Dish Soap on Hardie Board Siding?
A mild detergent diluted in water is generally fine for routine washing, applied with a soft, nonmetal brush and rinsed thoroughly. Always test it on a hidden section first, and avoid anything acid-based or abrasive regardless of how mild the label sounds.
How Often Should You Paint Fiber Cement Siding?
Plan on a full repaint roughly every 10 to 15 years, depending on sun exposure and the original paint's quality, according to Home Depot's guidance.
How Much Does Fiber Cement Siding Maintenance Cost?
Routine cleaning and small caulk or patch repairs typically cost very little in materials if done yourself. For professional repair, replacement, or a full James Hardie installation, Am-exteriors lists project pricing on its siding cost page, since costs vary by home size and scope of work.