
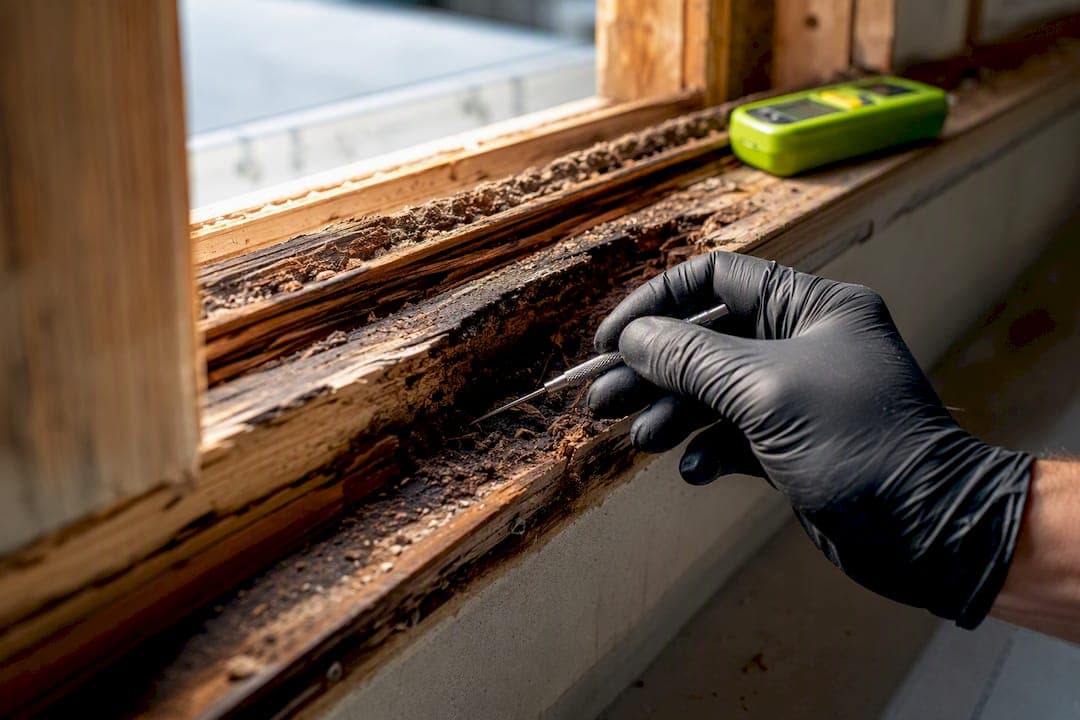
Small patches of rot in a window sill can usually be repaired with a two-part epoxy system once the wood is dry and structurally sound. Widespread decay changes that math fast. Start by probing the wood and checking moisture content before you buy a single tool.
TL;DR:
- Repair is appropriate only if less than 10% of the sill's surface is rotten and moisture content is below 17 percent, otherwise full replacement is needed.
- Rot that exceeds 50 percent of the structure or spreads into jambs and framing requires full sill replacement rather than patching.
- Proper epoxy repair involves removing all loose wood, applying a penetrating hardener, filling with marine-grade epoxy, and sealing thoroughly to prevent future rot.
- Using cellular PVC for replacement ensures the sill will not rot again but requires correct installation techniques to accommodate expansion and contraction.
- Regularly inspecting caulk, flashing, and gutters is essential to prevent water infiltration that causes rot, with a professional assessment recommended for recurring or extensive damage.
Table of Contents
- How to Decide: Repair vs. Full Sill Replacement
- How to Inspect and Map the Rot Before You Repair
- Step-by-Step Epoxy Repair: Remove Rot, Harden, Fill, Finish
- When to Splice or Replace the Sill Entirely
- Tools, Materials, and Realistic Cost Estimates
- How to Prevent Sill Rot From Coming Back
- A Contractor's Take on the DIY Ceiling
- How Am Exteriors Handles Window and Sill Damage
- Where to Read More on Sill Repair
- Sources
How to Decide: Repair vs. Full Sill Replacement
If the soft, spongy wood covers less than about a tenth of the sill's surface, a two-part epoxy repair will usually hold for years. Cross that line, and you're patching a problem that's going to come back through the parts you didn't fix.
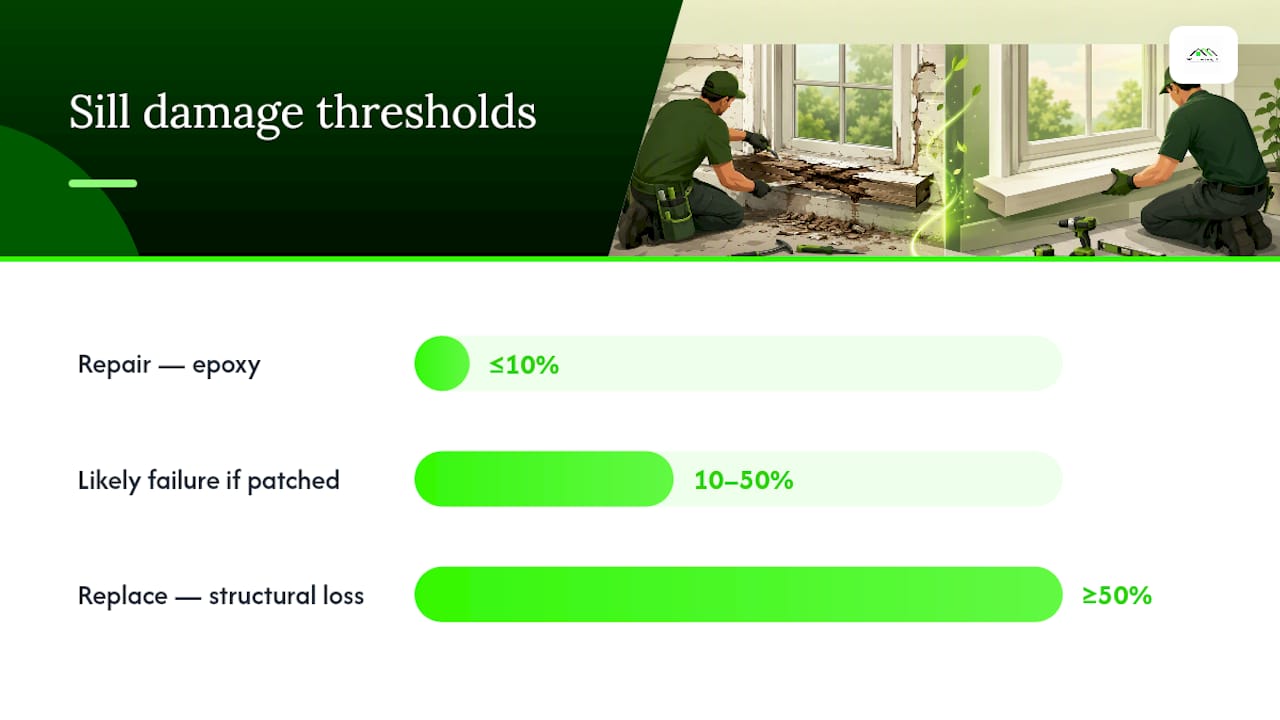
This Old House puts the harder threshold at structural loss exceeding roughly 50%. At that point, no filler, however strong, replaces load-bearing wood that's simply gone.
Watch for these red flags before you commit to a repair path:
- A screwdriver sinks into the wood with almost no resistance across a wide area.
- Rot has spread into the jambs or the window frame itself, not just the sill.
- Flashing above or below the sill is visibly cracked, rusted, or missing.
- The same spot has needed caulk or paint touch-ups more than once in the past two years.
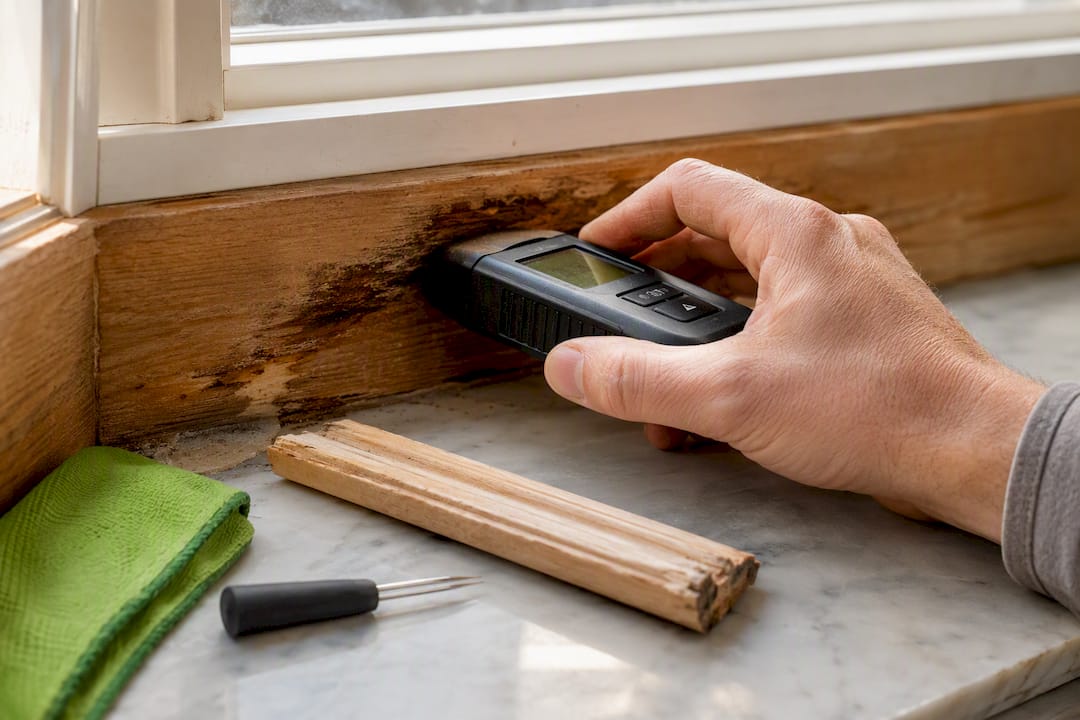
Before doing anything else, check moisture content with a pin-type moisture meter. Epoxy repairs need wood at or below roughly 17% moisture to bond properly. If readings run higher, give the area open air and sunlight for a few days, or speed things up with a heat gun on low, held well back from the surface.
How to Inspect and Map the Rot Before You Repair
A visual scan only tells half the story. Start with what you can see, then confirm it with tools.
- Look for surface tells first. Peeling paint, dark staining, or gaps where caulk has pulled away from the frame usually mark where water has been getting in.
- Probe with a screwdriver or awl. Sound wood resists a firm push. Rotted wood gives way, sometimes crumbling like wet cardboard.
- Take a moisture reading. Insert the meter's pins directly into the sill at several points, not just the worst-looking spot.
- Drill a few small pilot holes in suspect areas away from the visible damage. If shavings come out dark, powdery, or damp, the rot extends further than it appears.
- Pull the interior trim or exterior casing if needed to check the flashing and window jambs behind the sill. Rot rarely stays confined to the piece you can see.
- Photograph everything before you touch anything. Wide shots plus close-ups of the worst spots make a contractor's estimate faster and give you a record for an insurance claim if storm damage is involved.
Fine Homebuilding's contractor guidance backs up the probing step directly: professionals cut back to bright, sound wood rather than trusting a hardener to save fibers that are already compromised. Surface treatment on decayed wood is a short-term fix dressed up as a long-term one.
Pro Tip: Keep a cheap moisture meter in your toolbox year round. Checking sills, deck ledgers, and door thresholds once a season catches rot while it's still a $40 fix instead of a $400 one.
Step-by-Step Epoxy Repair: Remove Rot, Harden, Fill, Finish
This is the core workflow contractors and manufacturers both point to for a durable window sill rot repair. Follow the order. Skipping steps to save time is exactly how repairs fail early.
- Prep the work area. Strip any loose or peeling paint back several inches beyond the damage. Cover interior surfaces below the window, and open the sash so you're not fighting the window while you work.
- Remove all loose and decayed wood. Use a putty knife, chisel, or oscillating multi-tool to dig out anything soft. Fine Homebuilding's approach is the right one here: excavate at least an inch past the last spot of visible rot, into wood that resists your tool.
- Confirm dryness. Re-check moisture content with your meter. You want a reading under 17% before the next step, since epoxy won't bond properly to wet wood and can trap moisture that rots the repair from the inside.
- Drill penetrant holes. Space 1/8 inch holes across the excavated area and into the surrounding sound wood. These channels let the wood hardener soak into fibers you can't reach by brushing alone.
- Apply liquid wood hardener. Products like Abatron LiquidWood are formulated specifically to penetrate and stabilize decayed wood before you fill it. Saturate the area, including the drilled holes, and let it cure per the label, typically a few hours to overnight depending on temperature and humidity.
- Mix and apply the epoxy filler. A two-part marine-grade epoxy, such as Abatron's WoodEpox, gets mixed in small batches and packed into the cavity in layers rather than one thick pour. Press firmly to force out air pockets, which are the number one cause of voids that show up later as cracks.
- Shape while workable, then sand once cured. Most two-part epoxies stay carvable for 20 to 40 minutes, giving you a window to rough in the sill's slope and edges before they harden completely.
- Prime the entire sill, not just the repaired section. A patch that's primed differently from the surrounding wood shows through paint eventually.
- Caulk all seams with a 100% silicone or advanced polymer sealant where the sill meets the frame and siding. This is the step most DIYers rush, and it's the one that determines whether water gets back in.
- Paint with a quality exterior acrylic latex, matching sheen and color to the rest of the trim.
- Do a final check. Press firmly on the repaired area to confirm it holds like solid wood, run a bead of water along the seams to check for wicking, and re-test moisture a week later to make sure nothing is trapped underneath.
Marine-grade epoxy isn't a cosmetic filler. Popular Mechanics notes that these two-part systems chemically bond with wood fibers, creating a waterproof, load-bearing repair rather than a surface patch. That's the entire reason epoxy outperforms spray foam or auto-body filler for this job. Neither of those alternatives forms a structural bond, and both will eventually crack loose from thermal movement.
When to Splice or Replace the Sill Entirely
A splice, cutting out just the damaged section and fitting in new material, works when rot is confined to one end of the sill and the rest is sound. Full replacement makes more sense when decay runs the length of the piece or when you're already dealing with flashing failure behind it.
Replacing a sill generally follows this sequence:
- Remove the old sill carefully, noting how it interlocks with the jambs and casing.
- Template the new piece using the old sill or the opening itself, accounting for slope and overhang.
- Cut and dry fit before any adhesive goes down.
- Set the new sill with exterior-grade adhesive and corrosion-resistant screws.
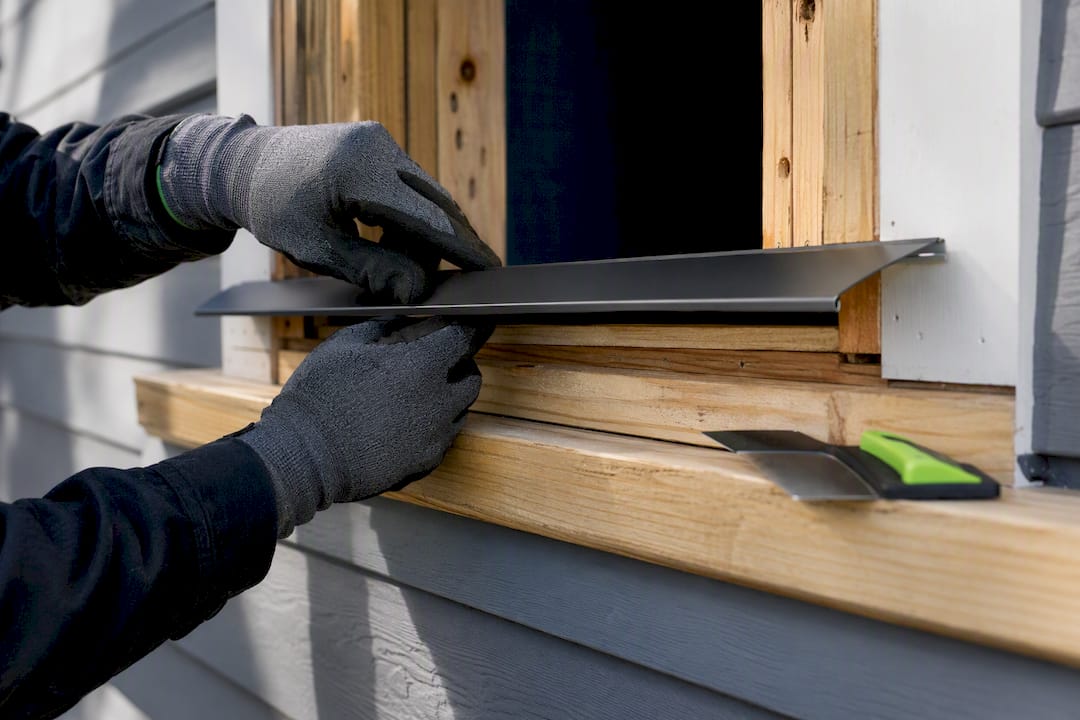
- Install flashing and felt paper or a self-adhered membrane behind and under the sill.
- Seal all joints and add or replace the drip cap.
- Prime and paint before final caulking, or finish according to the material if you've gone with cellular PVC.
Cellular PVC has become the go-to replacement material for a reason: it doesn't rot, ever. This Old House recommends it specifically because it holds paint well and eliminates the wood rot cycle entirely. The tradeoff is that PVC expands and contracts more than wood with temperature swings, so it needs PVC-rated adhesive and fasteners designed for that movement, not the same screws and glue you'd use on cedar or pine.
Pro Tip: If you're replacing a sill anyway, this is the moment to add or upgrade the drip cap above the window. It's a five-dollar part that does more to prevent future rot than almost anything else on this list.
Tools, Materials, and Realistic Cost Estimates
Here's what a proper window sill rot repair actually requires, and what it tends to cost.
Tools: putty knife, chisel or oscillating multi-tool, drill with 1/8 inch bit, pin-type moisture meter, heat gun (for drying, not stripping), sanding block, caulk gun, and a respirator mask if you're dealing with old paint that might contain lead.
Rough cost ranges:
- DIY epoxy repair on a single sill: materials typically run $40 to $100, since a small kit of hardener and filler covers several sills.
- DIY full sill replacement in wood: $60 to $150 in materials, more if you're matching custom trim profiles.
- Professional partial repair: often $200 to $500 per window, depending on access and finish work.
- Professional full sill or window replacement: costs vary widely by material and window size, and it's worth getting a written estimate rather than guessing.
Abatron products are sold direct and through several building supply retailers. Whatever brand you choose, read the manufacturer's cure times and temperature requirements before you start. Epoxy that goes on too cold cures poorly, no matter how good the product is.
How to Prevent Sill Rot From Coming Back
A repaired sill fails again for exactly one reason almost every time: nobody fixed how water was getting in.
- Inspect caulk lines every spring. Cracked or shrunken caulk around the sill and frame is the number one entry point for water. Redo it with 100% silicone or an advanced polymer sealant, not cheap acrylic caulk that shrinks within a year.
- Check flashing and drip caps annually, especially after a hard winter. Damaged or missing flashing is a root cause of rot, not just a contributing factor.
- Keep gutters clear and grading sloped away from the house. Water that backs up against siding eventually finds its way to window openings.
- Repaint before the finish coat fails, not after. Bare wood exposed to rain for even a few weeks can start absorbing moisture again.
- Walk the exterior after major storms. Wind-driven rain finds gaps that calm weather never reveals.
Schedule a closer inspection every couple of years, or sooner if you notice paint bubbling, a musty smell near the window, or soft spots returning to a sill you already repaired.
A Contractor's Take on the DIY Ceiling
Most homeowners can handle a contained epoxy repair on one sill with a weekend and the right products. Where DIY starts to break down is scope: rot running into the jambs, flashing that's failed behind the siding, or the same window rotting out for the third time in five years. Those aren't sill problems anymore. They're water management problems, and patching the visible symptom without tracing it back to a failed flashing detail just buys you another repair cycle in two or three years.
A professional inspection goes further than a moisture meter reading. It traces water paths behind trim and siding, checks whether the flashing detail was ever installed correctly in the first place, and documents everything with photos for a written estimate or an insurance claim if storm damage caused the failure. That documentation matters more than most homeowners realize until they're arguing with a claims adjuster without it.
— Heather
How Am Exteriors Handles Window and Sill Damage
If your inspection turns up rot in the jambs, flashing that's clearly failed, or a sill that's already been patched once before, that's the point where a professional look pays for itself. Local exterior contractors serving homeowners in the region often provide photo documentation and a written estimate before work starts, so you know what you're paying for and why.

A typical service call starts with a full inspection of the sill, flashing, and surrounding trim, not just the spot you called about. From there, you get options: a targeted repair if the damage is contained, or a full window replacement if the sill, jambs, or sash have gone past the point epoxy can fix. Professional jobs often come with warranty documentation, and if storm damage is involved, the contractor may assist with insurance claim conversations. If you're seeing recurring rot on a window sill, consider requesting an inspection to get a clear answer on repair versus replacement before purchasing materials.
Where to Read More on Sill Repair
A few resources go deeper into specific parts of this repair if you want more detail before starting.
- Popular Mechanics walks through the full epoxy repair process with moisture threshold guidance.
- This Old House covers full sill replacement and the case for cellular PVC.
- Fine Homebuilding details contractor-grade excavation and hardener technique.
- Lowe's offers a straightforward materials and steps checklist for wood sill replacement.
- Abatron provides product specs and usage instructions for LiquidWood and WoodEpox.
For related seasonal maintenance around window and door perimeters, One Day Doors & Closets has a useful winterizing checklist worth pairing with your sill inspection.
Sources
- How to Repair a Rotten Windowsill — Popular Mechanics
- How to Repair a Rotted Window Sill — This Old House
- Fixing Rotted Windowsills — Fine Homebuilding