
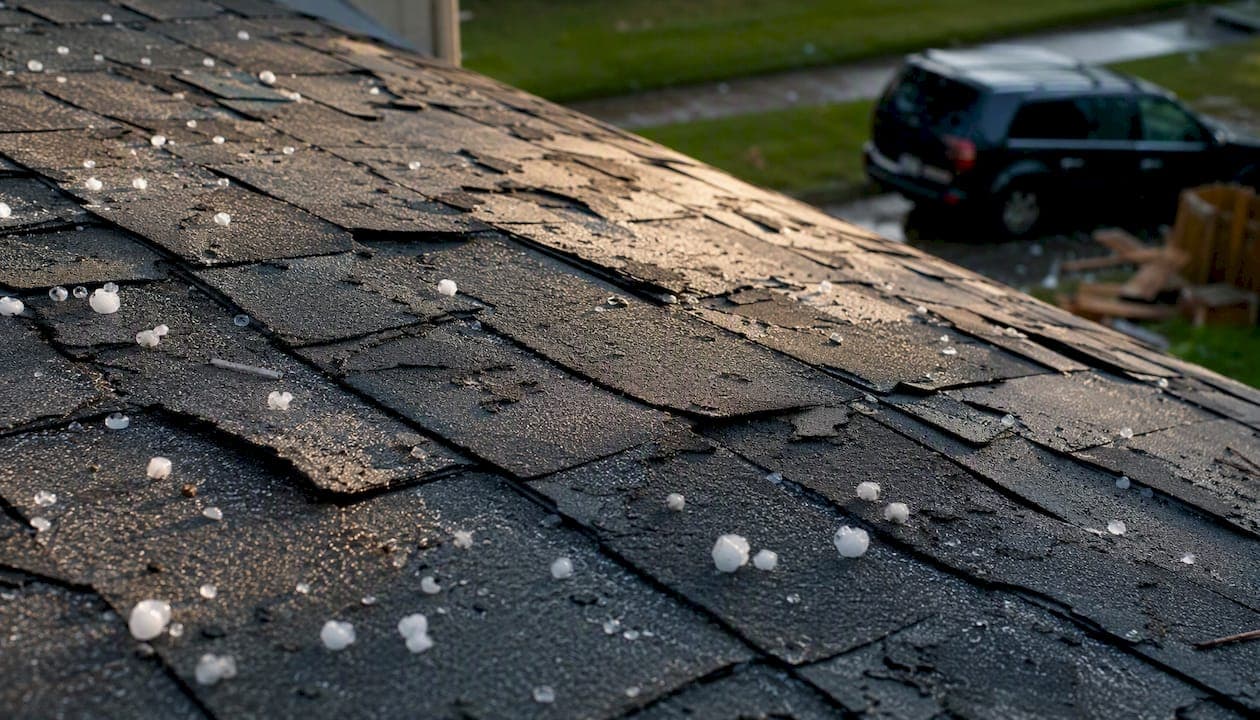
Quarter-size hail is the threshold where meaningful roof damage begins for most roofing systems. At that diameter, organic 3-tab shingles can sustain functional damage. Larger sizes escalate quickly, affecting fiberglass shingles, cedar, heavier wood shakes, and concrete S-tiles progressively. If hail hit your area, here are your first steps:
- Photograph everything immediately. Date-stamp your photos. Capture your car, gutters, window screens, and any visible roof edges from the ground.
- Check your gutters and downspouts. Granule accumulation after a storm is one of the clearest early signs of shingle damage.
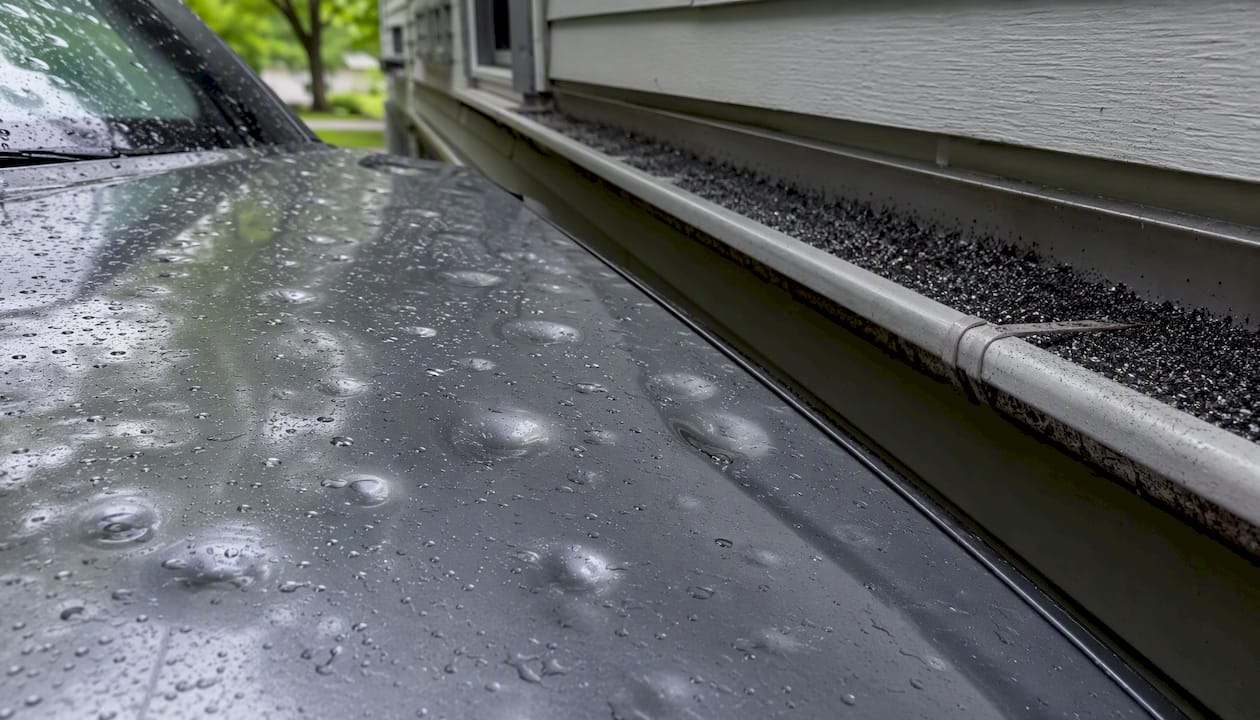
- Look at your car and metal surfaces. Fresh dents on hood panels or gutters confirm hail size and impact force at your specific address.
- Preserve a hailstone sample if any remain. Seal it in a zip-lock bag and photograph it next to a coin for scale.
- Schedule a professional inspection. A trained roofer can confirm damage, count impacts per square, and produce documentation your insurer will accept.
Pro Tip: Do not climb onto your roof to check for damage. Wet or structurally compromised shingles are slippery and can fail underfoot. Ground-level evidence and a professional inspection give you everything you need.
Key Takeaways
Quarter-size hail is the practical threshold where roof damage begins for most materials, and damage scales steeply with every size increase above that point.
| Size thresholds by material | Organic 3-tab shingles at about quarter size; fiberglass, cedar, fiber-cement at somewhat larger sizes; heavy shakes at a larger threshold; concrete S-tiles at a higher size threshold. | Document collateral damage first | Photograph cars, gutters, and screens within 24 hours; these surfaces confirm hail size at your address. | | Repair vs. replace guideline | Below ~10% impacted area, spot repairs are practical; above ~12%, full replacement is commonly recommended. | | Verify storm data | Pull the NOAA/SPC storm report for your county and date to corroborate your claim before contacting your insurer. | | Am-exteriors free inspection | Am-exteriors provides free hail inspections and insurance claim coordination across Southeast Wisconsin. |
Table of Contents
- How does hail size affect roof damage?
- What hail size damages each roofing material?
- How to identify hail damage on your roof and nearby surfaces
- Common conditions that mimic hail damage
- How to measure hail size and verify storm data
- When is repair practical versus full roof replacement?
- When should you call a professional roofing inspector?
- What a reputable contractor does during a hail inspection
- Sources
How does hail size affect roof damage?
Impact energy drives damage, not diameter alone. According to forensic roofing guidelines from Nelson Forensics, the variables that determine whether a hailstone damages a roof include size, density, fall velocity, shape, and angle of impact. Because mass scales roughly with the cube of diameter, a stone that is twice as wide delivers several times more kinetic energy than a smaller one traveling at the same speed.
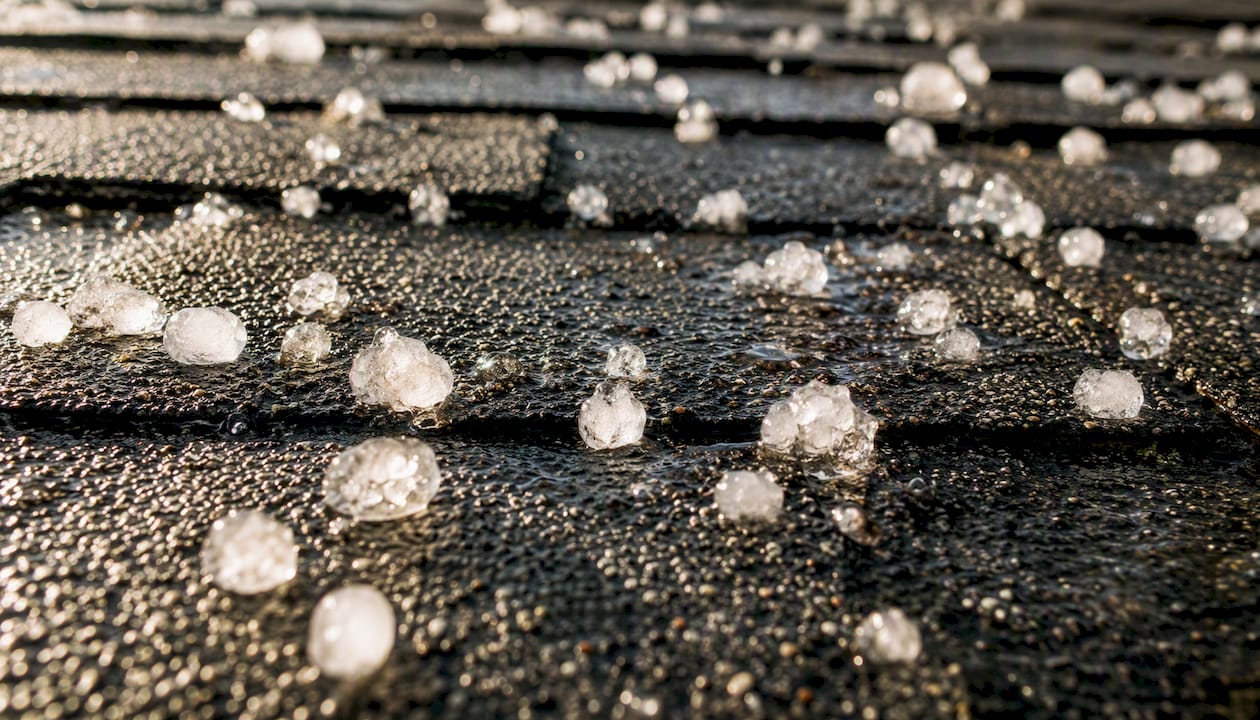
Here is what that means in plain terms: a 2.0-inch hailstone can deliver roughly eight times the kinetic energy of a 1.0-inch stone at similar velocity, according to hail damage assessment data. That non-linear jump explains why storms with golf-ball or larger hail produce claims that dwarf those from quarter-size events.
The variables that shift damage outcomes:
- Size: Larger diameter means more mass and more energy on impact.
- Density: Dense, hard hailstones cause more damage than soft, slushy ones of the same diameter.
- Fall velocity: Wind-driven hail hits harder than hail falling at free-fall speed.
- Shape: Jagged or irregular stones concentrate force on a smaller contact point.
- Angle of impact: Hail driven at an angle by wind hits windward slopes harder.
- Roof slope and age: Steeper slopes deflect some energy; older, brittle shingles fracture at lower thresholds.
Pro Tip: Dents on your car hood or aluminum gutters are reliable proxies for roof-impact severity. Collateral damage on metal surfaces often measures roughly half the diameter of the impacting hailstone, giving adjusters a field estimate of hail size even when no samples remain.
What hail size damages each roofing material?
Damage thresholds vary by material. The table below reflects InterNACHI's material-specific guidelines, which are widely used by inspectors and adjusters across the industry.
A few important notes on reading this table:
- Age shifts thresholds downward. A 15-year-old organic shingle may fracture at 0.75 inches; the same product new might withstand 1.0 inch.
- Product quality matters. Impact-resistant (Class 4) shingles, such as Malarkey's impact-rated lines, carry higher thresholds than standard 3-tab products.
- Low-slope roofs need different testing. TPO and built-up membranes require destructive test cuts by a forensic inspector to confirm whether the membrane back-side fractured.
- These figures are guidelines. A professional inspection with corroborating storm data is required for a final determination.
How to identify hail damage on your roof and nearby surfaces
You do not need to climb onto the roof to gather useful evidence. Most of the documentation adjusters rely on can be collected from the ground or from easily accessible surfaces.
Ground-level and collateral checks:
- Granules collecting in gutters or at downspout outlets after a storm
- Fresh circular dents on aluminum gutters, fascia, or downspout elbows
- Dents on car hoods, trunks, or roof panels (especially on unrepaired vehicles)
- Cracked or torn window screens
- Chipped or dented wood on deck railings or painted trim
- Broken or cracked skylights or vent covers
What to look for on the roof (from the ground or a ladder at the eave):
- Circular bruises or dark spots on shingles, especially on windward slopes
- Missing granules exposing the dark asphalt mat beneath
- Cracked or displaced ridge cap shingles
- Dented metal flashing around chimneys, vents, or valleys
- Cracked or shifted tiles on clay or concrete roofs
Documentation workflow:
- Photograph your car, gutters, and screens within 24 hours of the storm.
- Use a coin (quarter = 1.0 inch, golf ball = 1.75 inches per Farmers' Almanac size references) next to any dent or hailstone for scale.
- Take close-up and wide-angle shots of each damaged area, with timestamps active on your camera or phone.
- Screenshot or print the NOAA/SPC storm report for your county and date.
- Keep all photos in a single dated folder before contacting your insurer.
Pro Tip: Documenting collateral damage on cars and gutters is often the fastest way to get an adjuster to prioritize your hail claim. These surfaces are easy to inspect from ground level and provide clear, measurable evidence of hail size at your exact address.
Common conditions that mimic hail damage
Not every mark on a shingle is hail damage. Trained inspectors note that normal wear, UV degradation, manufacturing defects, and foot traffic regularly produce signs that look like hail impact to an untrained eye.
Common look-alikes:
- Granule loss from age or UV exposure: Uniform thinning across the entire roof surface, not concentrated on one slope or in random circular patterns.
- Blistering from manufacturing defects: Raised bubbles that pop and leave bare spots; these appear on multiple shingles in the same production batch and are not directional.
- Foot traffic scuffing: Scraped granules in linear paths, typically near access points like skylights or HVAC units.
- Algae and staining: Dark streaks running vertically down the slope, not circular impact marks.
- Thermal cracking: Straight or branching cracks along shingle edges from repeated freeze-thaw cycles, not the rounded bruise pattern of hail.
Quick checks that point away from hail:
- Wear is uniform across all slopes, including the sheltered north side.
- No dents on cars, gutters, or metal surfaces anywhere on the property.
- Granule loss follows foot-traffic paths rather than random distribution.
- The roof is older than 15 years and showing general surface degradation.
When in doubt, document what you see and request a professional inspection before filing. A forensic-style assessment separates functional hail damage from ordinary wear, which protects you from a denied claim.
How to measure hail size and verify storm data
Accurate measurement and verified storm data are the two pillars of a strong hail claim.
- Measure hail or impact marks with a ruler or coin. Place a quarter (1.0 inch), a golf ball (1.75 inches), or a tape measure next to the sample or dent and photograph it. Take the photo in natural light with a timestamp visible.
- Seal any remaining hailstones in a zip-lock bag. Photograph the bag next to a ruler before the ice melts. Label the bag with the date, time, and address.
- Check the NOAA/SPC storm report for your county. The SPC storm data archive logs preliminary severe weather reports by date and location, including reported hail sizes. Download or screenshot the relevant entry.
- Cross-reference with local storm reports. Your county's National Weather Service office publishes Local Storm Reports (LSRs) that often include spotter-confirmed hail sizes within a few miles of your address.
- Measure dents on metal surfaces. Indentations on light-gauge aluminum gutters or car panels often measure roughly half the diameter of the impacting hailstone, per Nelson Forensics guidance. A 0.5-inch dent suggests approximately 1.0-inch hail.
- Contact your insurer promptly. Most homeowner policies require notice within a reasonable time after the storm. Filing within 30 days is a common best practice; check your specific policy language.
Storm reports are time-stamped public records. Adjusters use them to confirm that a qualifying event occurred at your address on the date you claim. Saving that documentation before you call your insurer puts you in a stronger position from the first conversation.
When is repair practical versus full roof replacement?
The decision between spot repair and full replacement comes down to the percentage of the roof surface that sustained functional damage. Nelson Forensics guidelines used by forensic investigators and insurers provide a practical framework:
- Below ~10% of impacted area: Spot repairs are generally practical and cost-effective.
- 10–12% impacted: Case-by-case evaluation; replacement may be considered depending on roof age and material condition.
- Above ~12% impacted: Full replacement is commonly recommended.
Insurers apply two different valuation methods that directly affect your payout:
- Actual Cash Value (ACV): Pays replacement cost minus depreciation. An older roof may receive significantly less than the cost of a new one.
- Replacement Cost Value (RCV): Pays the full cost to replace with like materials, typically released in two payments (initial ACV payment, then recoverable depreciation after work is complete).
Wind/hail percentage deductibles are common in Wisconsin and other hail-prone states. These deductibles are calculated as a percentage of your home's insured value, not a flat dollar amount, and can be substantially higher than a standard deductible.
Additional factors that push toward full replacement:
- Shingles from the damaged slope are discontinued and no longer available for color-matching.
- The roof is within 3–5 years of its expected service life.
- Multiple slopes show damage above the 10% threshold.
- The existing roof has a prior repair history that complicates scope documentation.
For a detailed look at the repair-versus-replace decision specific to Wisconsin conditions, this guide on Wisconsin roof repair and replacement walks through the key factors.
When should you call a professional roofing inspector?
Some situations call for a professional from the start. Do not wait to see if damage worsens.
Call a pro when you observe any of these:
- Quarter-size (1.0 inch) or larger hail with visible dents on cars or gutters
- Granules visible in gutters or at downspout outlets after the storm
- Any visible punctures, fractures, or displaced tiles from the ground
- Multiple roof slopes showing signs of impact
- Active leaks or water stains on interior ceilings
What a professional inspection includes:
- Full roof walk covering all slopes, hips, ridges, valleys, and penetrations.
- Photographic documentation of each affected area with GPS and timestamp data.
- Impact-count test squares: the inspector marks a 10-square-foot area on each slope and counts confirmed hail hits to calculate percent-impacted area.
- Sample test cuts on low-slope membranes if needed to inspect the membrane back-side.
- Measurement of impact diameters on metal surfaces (flashing, vents, gutters).
- An itemized written estimate separating repair scope from replacement scope.
Professionals also cross-reference their findings with NOAA/SPC storm data and local storm reports to produce a corroborated, insurance-ready report. That documentation is what moves a claim from "under review" to approved.
Timeline guidance: Schedule an inspection within 7–14 days of the storm if possible. If you have an active leak, emergency tarping should happen within 24–48 hours to prevent interior water damage. Most insurers require that temporary repairs be made promptly to limit further loss, and they will typically reimburse reasonable emergency repair costs.
For homeowners searching for local help after a storm, storm damage roof repair guidance for Wisconsin covers what to expect from the scheduling and inspection process.
What a reputable contractor does during a hail inspection
Knowing what a thorough contractor inspection looks like helps you vet who you hire and understand the documentation they produce.
Contractor inspection checklist:
- Full slope-by-slope roof walk with annotated photo plan
- Test squares on each slope to count and record hail impacts per 100 square feet
- Measurement of impact diameters on metal surfaces (flashing, gutters, vents)
- Sample test cut on low-slope sections if membrane damage is suspected
- Itemized written estimate with line items for each slope and repair type
- Insurance claim coordination: direct communication with your adjuster and submission of the inspection report
Questions to ask before you hire:
- Are you licensed and insured in Wisconsin?
- Do you have experience with hail damage claims and adjuster negotiations?
- Can you provide a sample inspection report so I know what documentation to expect?
- What warranty do you offer on repairs and replacement materials?
- Do you work with Malarkey or other impact-rated shingle lines?
Am-exteriors offers free hail inspections across Southeast Wisconsin, with over 25 years of owner-operated experience. The company works directly with insurers, provides detailed photographic documentation, and installs impact-rated Malarkey shingles backed by manufacturer warranties. For homeowners who want to understand the full insurance claim process in Wisconsin, Am-exteriors handles adjuster coordination from the first inspection through final sign-off.
Pro Tip: Red flags when choosing a contractor: demanding an immediate signature before completing documentation, inability to provide verifiable local references, or pushing for full replacement on a roof with minimal damage. A reputable contractor shows you the evidence first.
What homeowners most often get wrong after a hailstorm
Most homeowners either act too fast or too slow. The ones who act too fast call their insurer before they have a single photo, which puts them in a reactive position during the adjuster visit. The ones who wait assume the damage is minor and miss their claim window entirely.
The detail that gets overlooked most often is collateral evidence. A dented car hood or a gutter full of granules is not just a nuisance. It is measurable, time-stamped proof of what happened at your specific address on a specific date. Adjusters know this. Document those surfaces before anything gets repaired or replaced.
The other common mistake is trusting a verbal assessment from a contractor who never walked the roof or produced a written report. Get the documentation in writing. An itemized inspection report with photos is what separates a paid claim from a denied one.
Am-exteriors handles hail inspections and claims in Southeast Wisconsin
After a hailstorm, the fastest path to a resolved claim is a professional inspection backed by solid documentation. Am-exteriors provides free hail damage inspections for homeowners across Southeast Wisconsin, covering roof repair and full replacement, siding repair, and emergency leak protection.

Here is what you get when you schedule with Am-exteriors:
- Free on-site hail inspection with a written, photo-documented report
- Direct adjuster coordination and insurance claim support
- Emergency tarping and temporary repairs to stop active leaks
- Roof replacement using impact-rated Malarkey shingles with manufacturer warranties
- Siding repair for hail-damaged LP SmartSide and vinyl siding
Schedule your free inspection at Am-exteriors.
Sources
Save or screenshot relevant storm reports before your adjuster visit. These sources are the primary references used throughout this article.
- Mastering Roof Inspections: Hail Damage, Part 3 - InterNACHI®
- Guideline to Assess Hail Damage to Shingle Roofs — Nelson Forensics
- SPC Climatology summary — NOAA SPC
- Hail Damage: How to Identify It, What It Costs — Farmers' Almanac
- Hail Damage Assessment Calculator (2026) — Claim-Grade Roof Estimate