
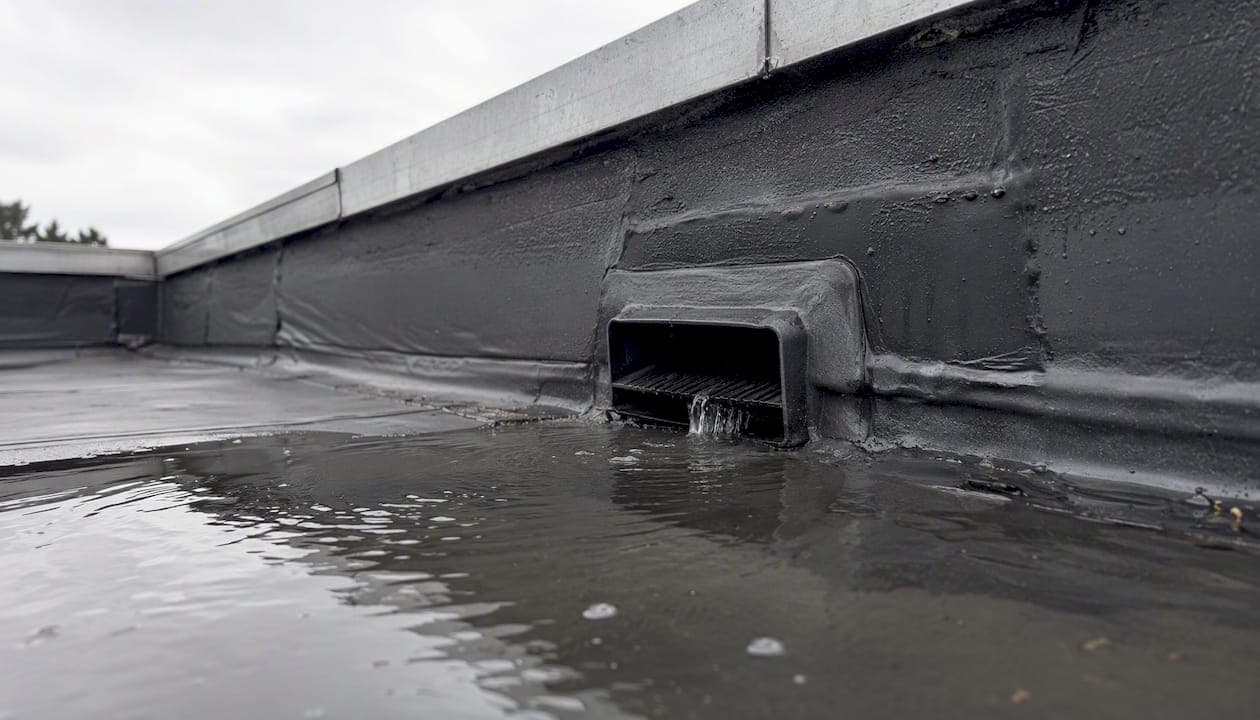
The right flat roof drainage system is the one sized and located to prevent ponding — water that remains standing 48 hours after the last rainfall, per the NRCA standard. For small roofs with external discharge, scuppers or edge drains are the practical choice. Gravity interior drains suit small-to-medium roofs where pipe routing runs inside the building. Siphonic systems belong on large footprints where fewer outlets and flatter horizontal pipe runs are needed.
Water weighs 5.2 lb per square foot for every inch of depth. A 20-by-20-foot puddle just two inches deep adds over 4,000 pounds to your structure. That load is not theoretical — it is the reason ponding is treated as a structural risk, not just a nuisance.
If you see standing water right now, take these steps:
- Clear visible debris from all drain outlets, scuppers, and gutters immediately.
- Wait 48 hours after the rain stops. If water remains, you have ponding by the industry definition.
- Measure depth with a ruler and photograph the area with a date-stamped image.
- If depth exceeds 2 inches, use a temporary submersible pump to remove water while you arrange a professional inspection.
- Schedule a contractor inspection if ponding persists after clearing outlets.
Pro Tip: Run the chalk-line test after clearing drains: snap a chalk line across the suspected low spot. If the line sits in water, the roof lacks adequate slope at that location — document it before the water evaporates.
Key Takeaways
Proper flat roof drainage depends on matching the system type to the roof size, correcting slope with tapered insulation, and detailing every outlet correctly — because ponding that persists beyond 48 hours voids most single-ply warranties and creates progressive structural risk.
| Point | Details |
|---|---|
| Match system to roof size | Use scuppers or gravity drains for small-to-medium roofs; siphonic systems for large footprints requiring fewer outlets. |
| The 48-hour rule | Water remaining 48 hours after rain is ponding by the NRCA definition and risks structural load and warranty voidance. |
| Slope is the permanent fix | Tapered insulation adds roughly $3.00–$5.00 per sq ft but eliminates ponding when designed correctly; adding drains without slope correction is a patch. |
| Outlet detailing is the failure point | The membrane-to-flange connection is the most failure-prone location; confirm flange size, clamping, and material compatibility before the membrane covers it. |
| Am-exteriors | Provides flat-roof drainage inspections, tapered insulation reroofs, drain work, and emergency clearing in Southeast Wisconsin with full photo documentation. |
Table of Contents
- Why flat roof drainage matters more than most owners realize
- What are the main flat roof drainage options?
- How designers size and locate drains
- What materials and components make up a drain assembly?
- Installation best practices that prevent future failures
- How to maintain your drainage system and catch problems early
- Common problems and how to troubleshoot them
- When should you hire a contractor, and how do you choose one?
- Owner checklist: detect, document, and act on drainage problems
- What actually matters when choosing a drainage approach
- Flat roof drainage services from Am-exteriors
- Sources
Why flat roof drainage matters more than most owners realize
Ponding water is defined by the NRCA as standing water that remains on a roof 48 hours after the last rainfall. The ARMA minimum slope guidance sets the industry standard at ¼" per foot of positive drainage — meaning every foot of roof surface should drop a quarter inch toward an outlet. Model building codes carry the same expectation for reroofing projects.
5.2 lb per sq ft per inch of water depth. A 30-by-30-foot ponding area at just 1.5 inches deep adds roughly 7,000 pounds to the structure below.
That figure matters because most flat roofs are not engineered for sustained wet loads beyond their design live load. Flat Roof Report documents the progressive deflection risk: ponding adds weight, weight increases deck deflection, and deflection deepens the low spot — which holds more water. Left unaddressed, this cycle can accelerate to structural failure.
Ponding also shortens membrane life in ways that are not always visible. UV degradation, algae growth, and freeze-thaw cycling all concentrate at standing water locations. The financial consequence is direct: single-ply membrane warranties commonly exclude damage caused by ponding water, so documented standing water after 48 hours can void a claim before you file it.
Temporary accumulation vs. chronic ponding — the distinction that matters:
- Water clearing within 24–48 hours after rain is normal lag, not ponding.
- Recurring wet areas in the same spots after every rain event signal a design or structural problem, even when individual events clear just under the 48-hour mark.
- Ponding that grows deeper or wider over months indicates progressive deflection and requires a structural engineer, not just a roofer.
What are the main flat roof drainage options?
Three primary drainage methods cover nearly every flat-roof application: scuppers (edge discharge), gravity interior drains, and siphonic (vacuum) systems. Gutters and downspouts are a fourth option, typically used on smaller residential roofs or as a supplement to scuppers.
Scuppers and edge drains
Scuppers are openings cut through a parapet wall or roof edge that allow water to discharge directly to the exterior. They are simple, low-maintenance, and have no internal pipe penetrations. The tradeoff is that they require adequate parapet height and must be sized for peak rainfall intensity — undersized scuppers back up fast. They work best on smaller roofs with low parapets and where exterior discharge is acceptable.
Interior gravity drains
Gravity drains sit in the roof field and route water through a drain bowl, strainer, and vertical leader pipe to the storm sewer below. They handle internal routing cleanly and suit small-to-medium roofs. Each drain covers a defined catchment area, and the system relies entirely on slope to move water. WATERPROOF! Magazine notes that gravity systems are the standard choice when roof area per drain stays within manageable limits and vertical pipe space is available.
Gutters and downspouts
Gutters collect runoff at the roof edge and channel it to downspouts. They are common on residential low-slope roofs without parapets. Gutter capacity must match the roof's catchment area and local rainfall intensity. Gutters require frequent clearing — leaves and debris block them faster than interior drains — and they are generally not suited to large commercial footprints.
Siphonic systems
Siphonic drainage uses specially engineered baffle inlets that prevent air entry, filling the pipe completely and creating negative pressure. That vacuum effect pulls water through horizontal collector pipes at high velocity, which means fewer vertical downpipes and flatter horizontal runs. The space savings under the roof deck can be significant on large buildings. The catch: siphonic systems require hydraulic modeling and precise design — air entry or calculation errors reduce performance dramatically and can produce worse ponding than a gravity system.
| System | Best for | Key advantage | Main drawback |
|---|---|---|---|
| Scuppers | Small roofs, low parapets, external discharge | No internal penetrations, simple | Requires parapet; can back up if undersized |
| Gravity interior drains | Small-to-medium roofs, internal routing | Reliable, widely understood | Needs vertical pipe space; slope-dependent |
| Gutters/downspouts | Residential, no-parapet roofs | Low cost, familiar | High maintenance; limited capacity |
| Siphonic systems | Large footprints, space-constrained buildings | Fewer outlets, flatter pipe runs | Requires hydraulic modeling; design-sensitive |
Secondary/overflow drains are not optional. Every system needs a backup outlet set slightly above the primary. If primary drains clog, overflow scuppers or secondary leaders prevent catastrophic loading. Building codes in most jurisdictions require them — confirm your design includes them before signing off on any proposal.
How designers size and locate drains
Proper flat roof drainage design starts with slope. The ARMA guidance is clear: a minimum of ¼" per foot of positive slope toward every outlet. On a new build, the structural deck can be sloped. On an existing flat roof, tapered insulation is the standard retrofit — polyiso boards cut at a taper to create falls-to-drain without touching the deck.
Sizing logic for gravity systems
Drain sizing follows a straightforward sequence:
- Determine the roof's total catchment area in square feet.
- Find the local design rainfall intensity (inches per hour) from your jurisdiction's storm data or IBC tables.
- Calculate peak flow rate: area × rainfall intensity, converted to gallons per minute.
- Select drain and leader pipe sizes from manufacturer flow tables that match or exceed that peak flow.
- Divide the roof into drainage zones, one per drain, keeping each zone's area within the drain's rated capacity.
- Confirm overflow/secondary outlets are set 2 inches above the primary outlet elevation and sized for the same peak flow.
A simple example: a 5,000 sq ft roof in a region with a 4-inch-per-hour design storm generates roughly 125 gallons per minute of peak flow. A single 4-inch gravity drain typically handles 50–75 GPM depending on head pressure, so two or three drains are the minimum — plus overflow outlets.
When gravity becomes impractical
As roof area per drain grows, gravity systems require more vertical pipe drops and more penetrations. Siphonic systems become attractive when roof footprints are large and building height or ceiling space limits vertical pipe routing. Designers commonly consider siphonic drainage when the catchment area per outlet exceeds roughly 1,600 sq ft (approximately 150 m²) under international practice, though local engineering judgment governs. Siphonic systems allow horizontal collector runs at near-flat gradients, which saves ceiling space and reduces the number of penetrations through the roof deck.
Gutter and downspout sizing
For edge-discharge systems, gutter width and downspout diameter must match the catchment area. A standard 5-inch K-style gutter handles roughly 5,000 sq ft of roof in moderate rainfall; a 6-inch gutter extends that to around 7,500 sq ft. Downspout sizing follows the same peak-flow logic as interior leaders. Undersized gutters overflow at the fascia and cause siding and foundation damage — a problem Am-exteriors sees regularly on Wisconsin properties after heavy spring storms.
What materials and components make up a drain assembly?
A flat roof drain is not just a hole in the roof. The assembly has several parts, and failure at any one of them causes leaks.
Drain bowl: The main body, typically cast iron, PVC, or stainless steel. Cast iron is durable and common in commercial applications. PVC is lighter and compatible with most single-ply membranes. Stainless steel suits aggressive environments or where aesthetics matter at exposed locations.
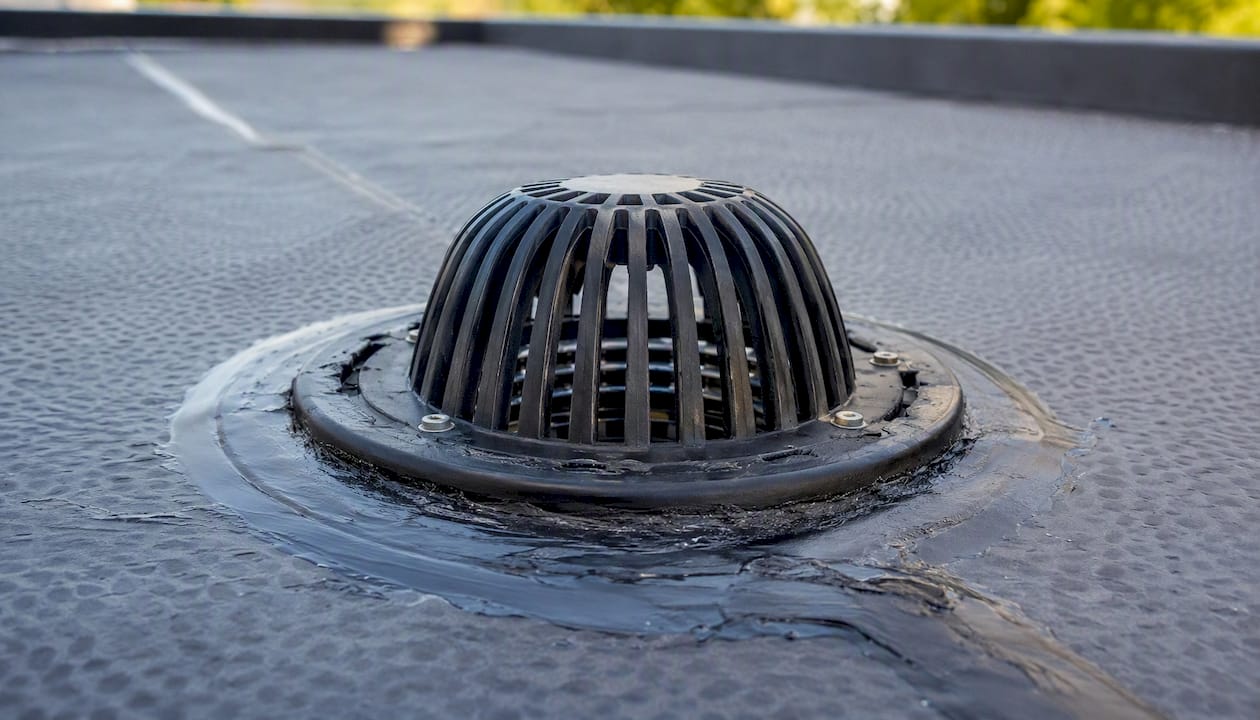
Strainer/dome: The visible dome or flat grate that keeps debris out of the leader pipe. Strainers must be removable for cleaning. A missing or damaged strainer is the fastest path to a clogged leader.
Clamping ring: The ring that compresses the membrane between the drain flange and the bowl body. The membrane-to-flange detail is the single most failure-prone location on any flat roof drain. The flange must be large enough to bond fully to the membrane, the clamping ring must apply even pressure, and the membrane material must be compatible with the drain material. A TPO membrane bonded to a cast iron drain without the correct primer and bonding adhesive will separate within a few freeze-thaw cycles.
Leader pipe: The vertical pipe carrying water from the drain bowl to the storm sewer. PVC is standard for interior runs in most climates. Cast iron is preferred where noise transmission through occupied spaces is a concern. Galvanized steel is used in some older installations but corrodes over time and is rarely specified new.
Flashing: The membrane termination detail at the drain perimeter. Flashing must be fully adhered, lapped correctly over the drain flange, and sealed at the clamp ring. This is where most field-installed drains fail — rushed installation skips full adhesion or leaves gaps at the clamp.
A note on membrane recoveries: Thicker membrane recoveries can inadvertently block scuppers. When adding a new membrane layer over an existing roof, scupper openings may need to be raised or extended to remain functional. Confirm scupper clearance before any recover project closes out.
Installation best practices that prevent future failures
Good drainage design fails if installation is sloppy. These are the details that separate a roof that drains for 20 years from one that ponds after the first heavy rain.
- Set drain elevation correctly. The drain bowl top should sit at or slightly below the finished membrane surface so water flows into it, not around it. A drain set even ¼ inch too high creates a permanent low ring of ponding around the outlet.
- Use tapered insulation to create falls. On an existing flat roof with inadequate slope, tapered polyiso insulation is the standard fix. It typically adds $3.00–$5.00 per sq ft to a reroof cost but eliminates ponding when designed and installed correctly. Slope-to-drain is built into the taper pattern, not added as an afterthought.
- Install crickets and saddles behind curbs. Rooftop equipment curbs, skylights, and HVAC units create shadow zones where water pools behind them. Tapered crickets direct water around these obstructions to the nearest drain. They are far less expensive than a full tapered insulation retrofit and solve localized ponding permanently.
- Match the outlet to the membrane system. A TPO roof needs a TPO-compatible drain with a weld flange or bonding flange. An EPDM roof needs an EPDM-compatible drain. Mismatched materials are a warranty violation and a leak waiting to happen.
- Core-drill vs. curb-mounted drains. Core-drilled interior drains penetrate the deck directly and are the cleaner, more permanent solution. Curb-mounted drains sit on a raised curb above the deck and are easier to retrofit but add height that can conflict with parapet or scupper elevations.
- Test before closing ceilings. Run a test pour — fill the drain area with water and watch the leader pipe outlet below for 15 minutes. Photograph the test. If the ceiling is closed before testing, a leak at the flange detail means tearing out finished work.
Pro Tip: Ask your contractor for a photo record of the drain flange detail before membrane installation covers it. That photo is your warranty evidence if a leak develops at the outlet later. A contractor who refuses to document this step is a red flag.
How to maintain your drainage system and catch problems early
Consistent maintenance is what keeps a well-designed drainage system performing. Clearing strainers and scuppers quarterly and after major storms resolves the problem entirely in roughly 30% of cases — meaning nearly a third of ponding complaints trace back to a blocked outlet that a 10-minute cleaning would have prevented.
Recommended inspection schedule
- Spring (March/April): Check all strainers, scupper openings, and gutter outlets after winter. Look for debris accumulation, ice damage to flashings, and any membrane displacement near drain bowls.
- Autumn (September/October): Clear leaf debris before it compacts and blocks outlets. Inspect leader pipes for silt buildup near the outlet — persistent silt suggests inadequate falls or a settled outlet that needs repair.
- After any storm exceeding 1 inch of rainfall: Walk the roof within 48 hours and check for standing water. Document with photos.
- Quarterly: Remove and clean strainer domes. Check scupper openings for debris. Inspect visible leader pipe sections for corrosion or joint separation.
The chalk-line test
Snap a chalk line across a suspected low area when the roof is dry. The line shows the surface plane. After the next rain, return within 48 hours: if water sits above the chalk line, the area is confirmed low. Measure depth with a ruler at the deepest point and record the approximate area in square feet. This gives you and your contractor a baseline to track whether ponding is worsening.
Drain flow test
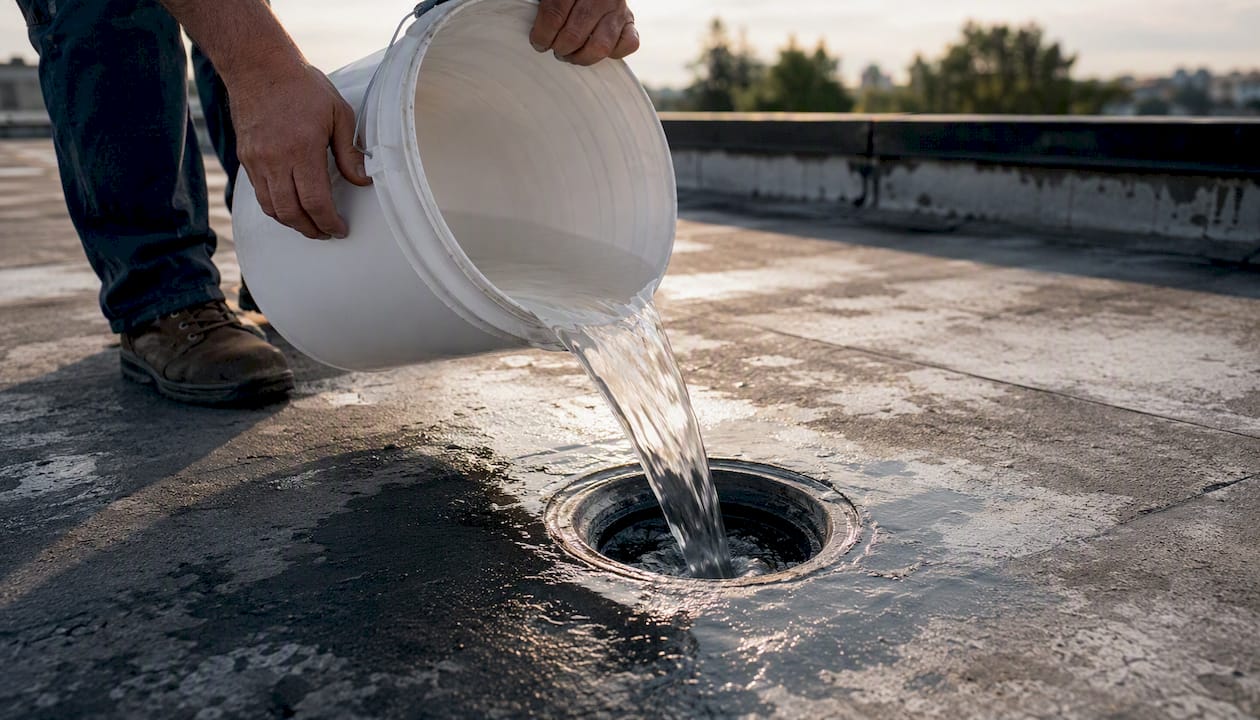
Remove the strainer dome and pour a 5-gallon bucket of water directly into the drain bowl. Time how long it takes to clear. A drain that clears in under 30 seconds is flowing freely. Slow clearing suggests a partial blockage in the leader pipe or a silt-packed outlet. Log the result with the date — this record supports warranty and insurance claims if water damage occurs.
Pro Tip: Schedule your two most thorough inspections in spring and autumn. Spring catches winter damage before the rainy season; autumn clears debris before freeze-thaw cycles compress it into a solid plug. After any storm that drops more than an inch of rain, do a quick 48-hour check even if the last inspection was recent.
Common problems and how to troubleshoot them
Most flat roof drainage failures fall into a short list of root causes. Matching the symptom to the cause determines whether a quick fix works or a permanent solution is needed.
Symptom: Recurring puddles in the same spot after every rain Root cause: Inadequate slope at that location, a settled drain outlet, or a clogged leader pipe. Clear the outlet first. If ponding returns after clearing, the roof lacks adequate falls at that point. Permanent fix: tapered insulation or a cricket, not just another drain.
Symptom: Ponding area growing larger over months or years Root cause: Progressive structural deflection. The deck is bending under repeated wet load, deepening the low spot. This requires a structural engineer's evaluation, not a roofing patch. Adding extra drains often masks missing slope — if the whole roof lacks pitch, additional drains alone will not solve the problem.
Symptom: New ponding after rooftop equipment was added Root cause: Equipment curb blocking drainage flow path. Install a cricket or saddle behind the curb to redirect water around the obstruction.
Symptom: Scuppers backing up during heavy rain Root cause: Undersized scuppers or debris blockage. Clear debris first. If the scupper is clean and still backs up, it was undersized for the catchment area or the rainfall intensity has increased. Enlarging the scupper opening or adding a secondary scupper is the fix.
Symptom: Ice dams at scuppers or gutters in winter Root cause: Water freezing at the outlet before it discharges. Heat tape on scupper throats and gutter runs is a short-term mitigation. The permanent fix is ensuring water drains fast enough that it does not sit long enough to freeze — which brings the problem back to slope and outlet sizing.
Short-term vs. permanent fixes
- Short-term: Clear debris, add temporary pumping for depth over 2 inches, apply a temporary sealant at a cracked flange detail.
- Permanent: Tapered insulation retrofit, drain addition or relocation (only when slope is adequate), cricket installation behind curbs, full or partial recover with corrected slope, structural evaluation for progressive deflection.
Tapered crickets behind curbs are among the most cost-effective permanent fixes for localized ponding — far less expensive than a full tapered insulation retrofit when the problem is isolated to one or two equipment locations.
When should you hire a contractor, and how do you choose one?
Some drainage problems are owner-maintainable. Others need a professional from the first inspection.
Hire a contractor when:
- Ponding persists after you have cleared all outlets.
- The ponding area exceeds 100 sq ft.
- Water depth exceeds 1 inch after 48 hours.
- Ponding is deepening or widening compared to previous inspections.
- You see visible deck deflection (a visible sag or bounce when walking the roof).
- The membrane shows cracking, blistering, or separation near drain outlets.
Qualifications to look for:
- Licensed roofing contractor with documented flat-roof experience (not just shingle work).
- Manufacturer certification for the membrane system on your roof (TPO, EPDM, or modified bitumen).
- References for tapered insulation installs specifically — this is a design-and-installation skill, not just labor.
- Familiarity with local building permit requirements for drain additions or reroofs.
Questions to ask before signing
- How do you size drains for this roof's catchment area and local rainfall intensity?
- Do you use hydraulic modeling for siphonic systems, or do you rely on rule-of-thumb sizing?
- How do you detail the membrane-to-flange connection, and what materials do you use?
- How does your warranty handle ponding-related damage, and what documentation do you provide?
- Will you pull the required permits, and what is the typical timeline for inspection and repair?
- Can you provide photos of the drain flange detail before membrane installation covers it?
Red flags in proposals:
- No specification of drain outlet type, flange size, or membrane compatibility.
- No mention of a photo record or test pour before closing ceilings.
- Pressure to sign before a written scope is provided.
- Unusually low bids with no material specifications — vague bids hide material substitutions.
- Proposing to add drains without assessing whether the existing roof has adequate slope.
For guidance on avoiding high-pressure contractor tactics, the Am-exteriors blog covers how low-bid proposals really work and what to watch for when evaluating drainage repair quotes.
Owner checklist: detect, document, and act on drainage problems
Run this checklist after any rain event that leaves visible standing water, or as part of your scheduled quarterly inspection. Safety first: do not go on the roof if it is slippery, if there is ice or snow, or if the membrane is visibly brittle or cracked.
- Safety pre-check. Confirm the roof surface is dry enough to walk safely. Wear rubber-soled shoes. Do not walk on a wet membrane near the roof edge without fall protection.
- Clear visible debris. Remove leaves, dirt, and debris from all strainer domes, scupper openings, and gutter outlets before assessing drainage.
- Wait 48 hours after rain stops. Return to the roof after the 48-hour window. Any standing water at this point meets the NRCA ponding definition.
- Run the chalk-line test. Snap a chalk line across the suspected low area when dry, then check after rain to confirm the low point location.
- Measure depth and area. Use a ruler to measure water depth at the deepest point. Estimate the ponding area in square feet (length × width of the wet zone).
- Photograph with date stamp. Take multiple photos from different angles. Enable your phone's date/time stamp or photograph a handwritten note with the date next to the water. These images are your warranty and insurance evidence.
- Run a drain flow test. Pour a 5-gallon bucket into each drain bowl and time the clearance. Log the result.
- Record findings. Write down the date, weather conditions, ponding depth, area, and drain flow test results. Keep this log with your roof warranty documents.
- Decide next step. If clearing outlets resolved the ponding: schedule quarterly maintenance. If ponding persists: contact a licensed flat-roof contractor. If depth exceeds 2 inches: use a temporary pump and contact a contractor the same day.
Pro Tip: Date-stamped photos and a written inspection log are the two things that most often determine whether a warranty or insurance claim succeeds. Keep a simple spreadsheet with date, findings, and photos attached. A contractor who sees organized documentation takes your claim more seriously and can quote more accurately.
If you need help after a storm, Am-exteriors offers emergency roof repair for urgent ponding and leak situations in Southeast Wisconsin.
What actually matters when choosing a drainage approach
The conventional wisdom in flat-roof drainage tends to focus on system type — scuppers vs. drains vs. siphonic — as if picking the right category solves the problem. It does not. The system type is secondary to two things: slope and outlet detailing.
A siphonic system on a roof with no positive falls will still pond. A gravity drain with a poorly bonded membrane flange will leak within two winters. The drainage category matters for sizing and routing; the slope and the flange detail determine whether the system actually works long-term.
The second thing most owners underestimate is the warranty risk. Single-ply membrane warranties commonly exclude ponding damage, which means a roof that ponds is effectively unwarranted at its most vulnerable locations. Owners who treat ponding as a cosmetic issue and defer repair are not just risking structural damage — they are paying for a warranty that will not pay out when they need it.
The practical priority order: fix the slope first (tapered insulation or crickets), then verify outlet detailing, then confirm secondary overflow capacity. Adding drains without addressing slope is a patch, not a fix. It may reduce ponding temporarily, but it does not correct the underlying condition, and it does not restore warranty coverage.
Flat roof drainage services from Am-exteriors
Am-exteriors handles the full range of flat-roof drainage work for property owners in Southeast Wisconsin: drainage inspections with written reports, tapered insulation reroofs that correct inadequate slope, drain addition and relocation, scupper installation and enlargement, cricket and saddle installation behind equipment curbs, and emergency drain clearing for urgent ponding situations.

Every inspection includes a documented photo record and a written findings report — the same documentation that supports warranty and insurance claims. For owners dealing with persistent ponding after clearing outlets, the roof replacement and flat roofing services page covers the full scope of reroof options including tapered insulation systems. For urgent situations, emergency roof repair is available for same-week response in Dodge, Washington, Fond du Lac, and Ozaukee Counties. Contact Am-exteriors to schedule a flat-roof drainage inspection and get a written report you can use with your warranty provider or insurer.
Sources
These are the primary references used throughout this guide. Each covers a distinct aspect of flat-roof drainage at a level of detail that goes beyond general contractor marketing.
- Flat Roof Drainage Systems: Key Considerations for Design, Installation and Maintenance | Capcon Engineering Ltd
- Ponding Water on Flat Roofs | Flat Roof Report
- Ponding Water Flat Roof: 2026 Fix Guide | The Roofing Brief
- Commercial Roof Drains and Drainage Systems | WATERPROOF! Magazine
These sources were selected because they represent industry association guidance, engineering practice, and practical troubleshooting — not contractor marketing. Cross-reference them when evaluating contractor proposals or verifying code requirements for your jurisdiction.